Wednesday, February 27, 2019

From Metal to Clay

In my last blog post, I shared with you my metal charm pendants that I use in my jewelry making but also samples of so much more that can be done with them.  Today I thought I would show you how they can be used to make your own molds or textures to be used with your polymer clay to create other designs.


There are many types of materials on the market, you can use to make a mold or texture sheet or you can even use polymer clay.  Helen Breil recently published a new lesson on textures which is full of tips and inspiration for making your own textures which can also be applied here.  I highly recommend her lesson if you want to explore this more.

To make a mold from my metal charm shown here, I am using scrap Premo brand clay that I had on hand and wanted to use up.

Roll out a sheet of clay that is thicker than the item you want to make an impression from.  Place it on a ceramic tile that has a smooth finish and you can put directly into the oven.  Roll the clay flat so it sticks to the tile and there are no air pockets trapped underneath.


Apply a generous amount of cornstarch to the clay as a release.  You can brush any excess back into your container after.  Firmly press the metal piece into the clay.  If the piece is not totally flat, you may have to tip or rock it back and forth or around to get a good impression.


Clay might raise up a little higher in some of the open areas.  You want it to be flush so either push it back down with your finger or scrape off some of the excess clay from those areas and then smooth out with your finger.

If the piece you are making a mold from is metal, you can always leave it in for the baking process and remove it after.  Trim your mold but leave it stuck to your tile and then bake according to temperature of the clay you are using.


 After your mold is baked you can use it to create your own designs from polymer clay.  Remember you will have to use a mold release each time to prevent your clay from sticking.

Here are some samples of pieces I created from my own molds using various metal charms.


The last two pieces I made were mounted on a snap for interchanging.  I really prefer this method for several reasons.  Before it was always a struggle as to how to finish off each piece.  Placing a snap on the back allows the piece to be worn more than just one way.


For instance, these larger size pieces can be added to a snap base on a necklace or worn on a scarf.  I use to have so many finished jewelry pieces in stock waiting for that right person who is in love with just that one piece.  With snaps, however, I can "Create the Art" and the wearer can "Choose how to Wear it".


I have several options for adding a snap design to a scarf.  My "It's a Cinch Scarf Clip" is my original design and will work with almost any scarf type or thickness.  I have also come across these traditional scarf slide type rings that have a snap base.  They are available in my online store under the Snap Scarf Slide section but also in the DIY section.


Sunday, February 24, 2019

Playing Around With Metal Pieces

I created a new line of chunky jewelry designs for my fall collection last year by combining large metal charms with snap bases.  These were not only fun to create but are so much fun to wear.  There is a snap base for interchanging the decorative snaps and the entire piece clips off the cord for interchanging onto different necklace chains or cords.


This year I decided to kick it up a notch and finally had some time to play around more with these large metal charms. There are so many things that can be done with them.  Here are just a few examples of which I will be sharing some tips on a little later.

Creating faux gemstones with resin:


Or filling in with a faux enamel look:


Adding smaller Swarovski crystals or rhinestones to the small bezels in the pieces.


For another look, back-filling the pieces with polymer clay.


And finally, creating a mold or texture -- then creating your polymer clay pieces from it.


I find the metal charms quite appealing but I am more drawn to color over the plain silver.  Working the design into clay completely transforms it!  And the sky is the limit to how you want to create.


I have a selection of these large charms available in my online store under the DIY supplies section.  Over the next week I will be sharing some tips on how to work with these beautiful pieces using various materials like polymer clay, resin and inclusions.

Sunday, February 17, 2019

New Shawl and Collaboration

Over the past few months I have been collaborating with a good friend of mine, Carmen, who is also in the same Artisan Co-op Market that I am in.  She is a talented crocheter and goes by "Stitches in Tyme - Contemporary Crochet".  I have been posting some of her pieces with my buttons and shawl pins on my facebook page but I wanted to share more about it here.

This is a shawl she recently made for me.  I had the yarn sitting around hoping I could find the time to eventually make something but never seemed to manage it.  So I was more than happy to give it over to Carmen when she offered and now I am so excited I have my finished piece and can hardly wait to wear it!


Isn't it lovely?  It is also super soft and drapes so beautifully.  The yarn is from Colour Adventures and in a Cupcake blend which took 2 "cakes" to create.


The shawl sticks are from my Snap Decisions Collection which have a snap base and you can interchange the decorative snaps.


Carmen has other beautiful shawls that she has created available in the Shuswap Artisan Market.  I have matched up some optional shawl pins to coordinate in case someone is looking for that perfect match.


Or if you would like Carmen to make something special for you, she does custom orders.  You can see more of her creations on her facebook page here.


Carmen also crochets hats, scarves, finger-less gloves and unique baskets, just to name a few.  We have also teamed up by adding a snap base, instead of typical buttons to some of her hats.


This is so much fun as you can choose your preferred accent design and interchange them for a whole new look!  We have a selection available in my online store and if you would like Carmen to make you a different color or design with an added snap base, just contact me or Carmen with your request.

Tuesday, January 29, 2019

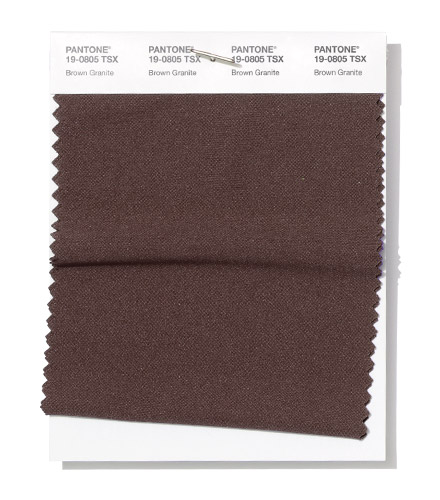
Clay Recipes for the Pantone Spring 2019 Colors Eclipse, Soybean and Brown Granite

Along with the Sweet Corn clay recipes that I shared yesterday, Eclipse, Soybean and Brown Granite are the other three Neutrals that Pantone includes in their spring 2019 fashion color palette.

Eclipse is a deeper shade of navy blue compared to the navy used in the past seasons.  Navy is sometimes referred to as the "new black" and I have found that my buttons and jewelry pieces created in navy as the dominant neutral instead of the typical black, have become quite popular.  Many people find they do not look good in black as it can drain their facial color where they can wear a dark neutral such as navy without the same negative effect.


While I show three of these neutral colors together they will also compliment the other colors in the Pantone Spring palette.  For instance, instead of using a white or ecru in your mokume gane blend, try using Sweet Corn or Soybean instead.  Or for a dark shade, you can use the Eclipse or Brown Granite instead of black.

I am going to continue on experimenting with my color blocks and see what new combinations I can come up with and perhaps expand this style even a little further which I will share with you later.  In the meantime, here are the last three recipes for the Pantone colors Eclipse, Soybean and Brown Granite using Kato clay.

Eclipse
Follow the base recipe for Navy # 9-7,
increasing the Kato Black to 2 parts

Soybean
2 parts Ecru Base #2-7 *
1 part Kato Yellow
1 part Kato Pearl

Brown Granite
Same as the clay recipe for
Chocolate Truffle # 3-5 *


* Note:  These clay color recipes are created using Kato clay.  Any of the base color "mixes" used are from my Clay Color System. 


If you do not have my Clay Color System tutorial, it is available in my Online Store (Canadian pricing and sent to the e-mail address you provide).

Tomorrow I will have these clay recipes available on 4x6 index cards that you can print out if you wish.  Please feel free to leave a comment here or on facebook if you have enjoyed receiving these clay recipes.  

Monday, January 28, 2019

Clay Recipes for the Pantone Spring Fashion Colors Princess Blue and Toffee

The last two clay recipes of the main Pantone 2019 spring color palette are Princess Blue and Toffee.  Tomorrow I will share three more clay recipes which are the Neutrals.  Sweet Corn is one of these neutrals which I have decided to show here as well.  If you have my clay color system, you already have this recipe along with the Toffee.

Here are some samples I mixed up combining these three colors.  The earring dangles (diamond shape) are all reversible and can be worn on their own or added to the posts.

Sweet Corn & Toffee

Princess Blue & Toffee

Reversible & Interchangeable Earrings
Princess Blue, Toffee & Sweet Corn

And finally the recipes for the Pantone colors Princess Blue, Toffee and Sweet Corn using Kato clay.


Princess Blue
8 parts Kato Blue
1 part Kato Violet
2 parts Kato Pearl
1 part Ecru Mix #2-8 *

Toffee
Same as clay recipe
Tanned Leather # 3-6 *

Sweet Corn
Same as clay recipe
Cream # 2-10 *


* Note:  These clay color recipes are created using Kato clay.  Any of the base color "mixes" used are from my Clay Color System. 


My Clay Color System tutorial, is available in my Online Store (Canadian pricing and sent to the e-mail address you provide).