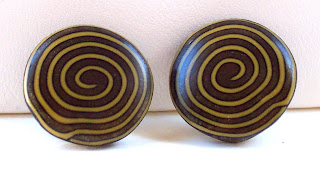
Tuesday, December 29, 2009

Some New Cord Styles for the New Year

After creating our clay beads and pendants comes the decision of how they will be finished into jewelry pieces.  Should they be wire wrapped, strung or just hung on a cord for best effect?  When it comes to pendants on cords,  I like to "lock" them into place whenever possible.  This prevents the cord from "walking" with the clasp ending up at the front.  The pendant below is an example of one that is finished this way:


Our favorite type of cord we like to use is the "Softglass".  It is like rubber cord but is slightly translucent, very strong, yet flexible and almost looks like frosted glass.  It has a hole going through the center which is perfect for stringing wire through.  I like to use "softflex" wire in this case and even though it isn't necessary, I prefer the 49 strand due to it's strength and flexibility so the softglass cord can still drape nicely.

Another type of cord we recently discovered is a stainless steel cable that is nylon coated.  They come in a variety of colors with a screw barrel type clasp.  I prefer to cover this clasp with clay so it is more comfortable on the neck and easier to handle.  These cables work great for shorter (16-18") choker type necklaces.  They are also great when you really want to show off the pendant or beads and not have the cord as a  distraction.


I sell these with the finished clasps in our Art Fire and Etsy shops as they are great if you want a simple cord to use for interchanging pendants.  These cables work great for beaded style chokers as well making them more versatile.  We have them in silver and gold and will have more colors available soon.

My latest discovery, however, is combining these cables with the softglass cord.  I found there is a slight "walking" problem when using these cables on a pendant so I was experimenting with ways to "lock" them in.  When I cut small pieces of the softglass and thread them on the cable they look like little beads but are also nonslip and gently keep the beads or pendant in place.  I can use the softglass pieces in contrasting colors like beads or in the same color as the cable to blend in.


This new style will work well with some of the new clay designs I'm working on and will be available in the new year.

Thursday, December 24, 2009

Merry Christmas Everyone

Well it is Christmas eve and we just want to wish everyone a very merry one.    I came across some beautiful handcrafted nativity scenes and since we believe this is the reason for the season, we wanted to share them with you.


Dave and I have several reasons to celebrate this time of year.  Our wedding anniversary is on the day after Christmas which we call here in Canada, Boxing Day.  So have a great holiday and will post again in a few days.

Merry Christmas!

Tuesday, December 22, 2009

Some more holiday fun

A fellow Canadian polymer clay artist, Violette Laporte shared a link to a cool site on her blog today.  It is called myoats and is a fun place to play around creating all sorts of shapes, drawings and designs.  There are all types of settings to experiment with and I could get lost in it for hours -- don't know if that is a good thing but perhaps a good stress reliever at this time of year!  Have fun!


Monday, December 21, 2009

One Cane -- Many Designs

I often get requests for custom orders which I love to do. When I create a jewelry piece, however, I don't like to create the exact thing twice.  There is generally some sort of variation in the design or color.  One customer at a show loved a brooch (below left) I had and asked if I could make something similar but as a pendant for a Christmas gift.  The one I created for her is below on the right.
 
It was basically made from the same cane but arranged differently.  This customer loved the piece and then contacted me several weeks later. She said she liked the one I made for her so much she asked if I could make her another one.  I decided to do up several more and then give her a choice of which one she would like.  These are four others I made, again from the same cane.


I used the same cane slices to create these other pieces:


These are just some of the variations that I have made from one cane so far and the only limitation is your imagination.

Friday, December 18, 2009

Christmas Wish List

I'm running low on supplies and is almost time to order more.  While browsing through my favorite sites I couldn't help think about what I want to add for my Christmas wish list for this year.  One thing I am in need of is a new pasta machine.  Mine is pretty much worn out and I want a really good one this time and possibly with a motor.  I don't mind cranking my machine manually but with the tendinitis in my shoulder, a motor could be quite useful for conditioning large batches of clay.


I was really drooling over the new "Dream Machine " and if it is such a good machine as they say, then is probably worth the money.  But if I want a motor for it, forking out another $375 is a little difficult to swallow.  I think I will probably stick with a good Italian made pasta machine, with or without a motor, for now.

Then there is the question as to where to buy.  I like to buy from Canadian suppliers whenever possible, however we don't have as much selection here as in the U.S.  Fortunately we have Shades of Clay which is a main supplier for my Kato clay and gives fair prices when ordering large quantities as I do.  They also have some other neat stuff available so it is like visiting a candy store every time I go to their site to place an order!  So what other things are tempting me?  Let's see....

How about some new discs for my extruder ---  or an extruder adapter that makes a hollow core ---


Maybe some of Lisa Pavelka's craft Foils  --  I could experiment with making faux dichroic glass.

Liquid Kato -- in different colors.  I use a lot of this in the clear but never tried any of the colors yet.


Some Kemper cutters -- can't believe I still don't own any of these yet!


And of course there is a whole lot more but I will have to stay focused for now and not get too carried away!  I will let you know later what I decided on!

In the meantime, what is on your Christmas wish list???  Would love to hear about it....

Thursday, December 17, 2009

A fun site to check out over the holidays

I discovered a new blog/website the other day called Craft Stew.  Looking at the Archives, it's been around for over a year now and I don't know why I never came across it before.  Check out the Top 20 Posts with all sorts of projects and tutorials for all kinds of crafts including my favorites: sewing, jewelry making and  polymer clay.  The Fast and Yummy Vegetarian Chili recipe sounds really appetizing on a cold winter day.


So how did I finally find this site?  You will find a live traffic feed at the right side towards the bottom of this blog.  It shows the cities and countries where visitors have come from and will sometimes give a link to the site they were last visiting.  A site name I'm not familiar with will sometimes catch my eye and so I have to check it out.  I then discovered I was getting visitors from Craft Stew due to them posting links to some of my tutorials on there.

Another method I use for finding new sites is checking out the links from our followers. Whenever we get a new follower I like to check out who they are, where they are from and what other types of interests they might have.  It is so cool to communicate with people from all around the world in this way.

So hope you have as much fun checking out Craft Stew as I did.

Wednesday, December 16, 2009

A Christmas Greeting

It's that time of year when we look forward to all those Christmas cards we get in the mail.  I've toyed with the idea for several years now of making our own cards but never seemed to find the time.


I was browsing through Martha Stewart's website and came across these really pretty "pop-out" cards.  Imagine using a snowflake design that was created on the snowflake website!  Or a chance to use my own artwork.  I'm wondering how some clay could be incorporated in some way.  If I start to work on my idea now, I might have them done in time to send next year!

Tuesday, December 15, 2009

10 Days Until Christmas

. . .  we are finally finished with Christmas craft fairs for the year.  Custom orders that we had to fill have all been sent out or delivered.  Now we can relax and focus on Christmas cards and gifts for our friends and family.  Even though it can be extremely busy, it is still my favorite time of year.

For the next while I thought I would share some of my favorite Christmas websites or cool things that I've come across on the internet lately.  I discovered a fun website where you can design your own snowflakes from Sandy's blog (Simple Inspirations by Sandy).  I had to try it out and found it rather addicting.  I think I will have to practice a little more as mine didn't come out quite as elaborate as some of the ones others have created but it took a bit to figure out how to make it work.


So, I think I will play with it some more and see what else I can come up with.  Hmmm maybe this could be a fun way to play around with creating some kaleidoscope canes ...

Thursday, December 10, 2009

Tutorial - Stringing a Tile Bracelet with 2 Holes

I showed earlier how to string a stretch tile bracelet.  This time I will give a tutorial on stringing a tile bracelet using flex wire and a clasp.  Most of the tile beads I create are double sided so they can be reversible like the ones shown below:


To determine the finished length of your bracelet, wrap a cloth or flexible measuring tape loosely around your wrist.  If you do not have this type of measuring tape, you can always print one out .  This is your wrist measurement but you do not want the bracelet to fit too tight so add a little extra to a fit that you prefer.


I like to lay my tile beads out with the spacer beads between so I can see how they look and how many I will need to make my bracelet.


You need to decide what type of clasp you would like to use - there are many options.  I like a toggle clasp myself which is what I will be using here.

Cut your flex wire (I'm using a 49 strand softflex in clear) double the length of your bracelet adding a 3-4  inches for finishing.  Thread a crimp bead onto one end of your flex wire, thread the wire through the T section of your toggle clasp and back again through the crimp bead.  Crimp the bead using your crimping pliers.


I like to add a crimp cover but this is optional.


Thread several small seed beads and one spacer bead onto the wire.  You need just enough seed beads so the toggle clasp will fasten easily when the T part is inserted.


Add the remaining tile and spacer beads all the way down one side.


When you get to the end, finish with a spacer bead, insert the other half of the toggle and another spacer bead going back into the 2nd hole of the end tile.


Another option is to use a beaded loop instead along with a button or the T part of a toggle like I'm doing here:


Thread the flex wire back through the other side of the tiles to the other end.  You will want to check the size and fit at this point before you finish it off completely.


Finish off with a spacer bead and small seed beads using the same amount as the beginning.  Add a crimp bead, thread the flex wire through the clasp and back through the crimp bead again.


Finish off by threading the wire tail through the beads and trim.  Add a crimp cover over the crimp bead (optional).


Your bracelet in now finished!  Wear, enjoy and admire!


Tuesday, December 8, 2009

Tartan + Wool = Sheep

I finished another custom order this week.   a tartan in blue and green with a red stripe, similar to the ancient tartan her husband wears.  I was already planning my next tartan cane and looking for color combination ideas, so this is how my latest tartan came about:


I love the colors in this plaid as they are very striking yet also warm and soothing.

I was asked if I could make a shawl pin in the form of a sheep using this tartan cane.  She explained how as a knitter and the wife of a Scotsman, sheep have a special place in her heart.  I never made a shawl pin before -- or a sheep either on the other hand -- but I loved the idea and decided to take the challenge!

Once I drew out my pattern, the rest fell into place.  I made a veneer in the tartan and cut out my design with it.  I added the face and ears last.  I found the perfect steel pin that I covered in clay that actually glides through the knitted sweater or shawl beautifully.


I'm extremely pleased with how the whole piece turned out and now I will have to make a shawl pin for myself!

Sunday, December 6, 2009

Cute as a Button

. . .  except these aren't buttons but rather little post earrings.  One of the things we enjoy the most about selling in local markets and shows is the opportunity to meet so many people that live in our area.  We also get a lot of feedback and ideas for new designs and several people requested smaller post-type earrings to match their necklaces.  After making up a few custom orders I decided to make more to add to our collection.  These are a lot of fun to make and I have a system now where I can make them more consistent in size and shape.  We use surgical steel posts and embed them into the clay before baking so there is no gluing needed afterwards.  I'm not a real fan of glue and try to avoid it whenever possible!

I have some of these listed in our Art fire Studio as well in our Etsy Shop that match our beads and buttons.