Monday, March 28, 2011

Faux Turquoise

Turquoise is one of my favorite stones and after a lot of practice, I have developed my own faux turquoise from clay.


I generally like to make a large batch at a time and then use it straight or create veneer sheets for covering.  I start by mixing in real dirt and paint with my clay and can look like a real mess!


It is hard to believe that it eventually turns out like this:


The beauty of making your own is you can create pieces in any shape or size imaginable.  These are some of our latest jewelry pieces.


Saturday, March 26, 2011

Blog Debris - Color Scheme Designer

Here is a fun site that you can play with and explore the color wheel and color combining.  It is called the Color Scheme Designer and you can drag your mouse to select the colors in the wheel as well as all other kinds of settings.


If you are really into Pantone colors like I am, check the tab at the top that says "color space" and click on "Pantone colors".  The colors adjust to the pantone shades and when you hover your mouse over all the colors it will give the Pantone color swatch numbers that match. 

Wednesday, March 23, 2011

Clay Veneer Sheet Storage Tip

I was reading a clay book some time ago and the writer had suggested storing clay veneer sheets in plastic page protectors.  I wasn't really sure how well that would work but I was keeping them stored in containers and wasn't really happy with that system.  I would forget what was in the box and had to pull everything out to find what I was looking for and some of the sheets would start to dry out and crack.

I had several types of sheet protectors and decided to test them out to see if they would react with the clay.   I would check them every day and after several weeks there was no reaction with the plastic whatsoever. so I proceeded to fill them with my clay veneer sheets and pieces I had stored.

I liked the clearer type protectors as I could see through them much better and went with those.  I cut down the one side leaving the bottom seam still attached.  I could then fill the sheet up with all my clay pieces easily and then "reseal" it again.


It is really cool how the clay sheets stick to the plastic sheet keeping it sealed and you can turn the pages in the binder without them falling out or moving.  It also keeps them nice and clean and dust-free.


This is such a handy way to keep them and I store them in the same binder as my Clay Color System Recipes, etc. so everything is all together.

Monday, March 21, 2011

Tutorial - Making a Large Bead into a Fan/Light Pull

I've been asked how we attach the wire to the ball chain in the large textured tube beads in my Textured Tubes & More tutorial.


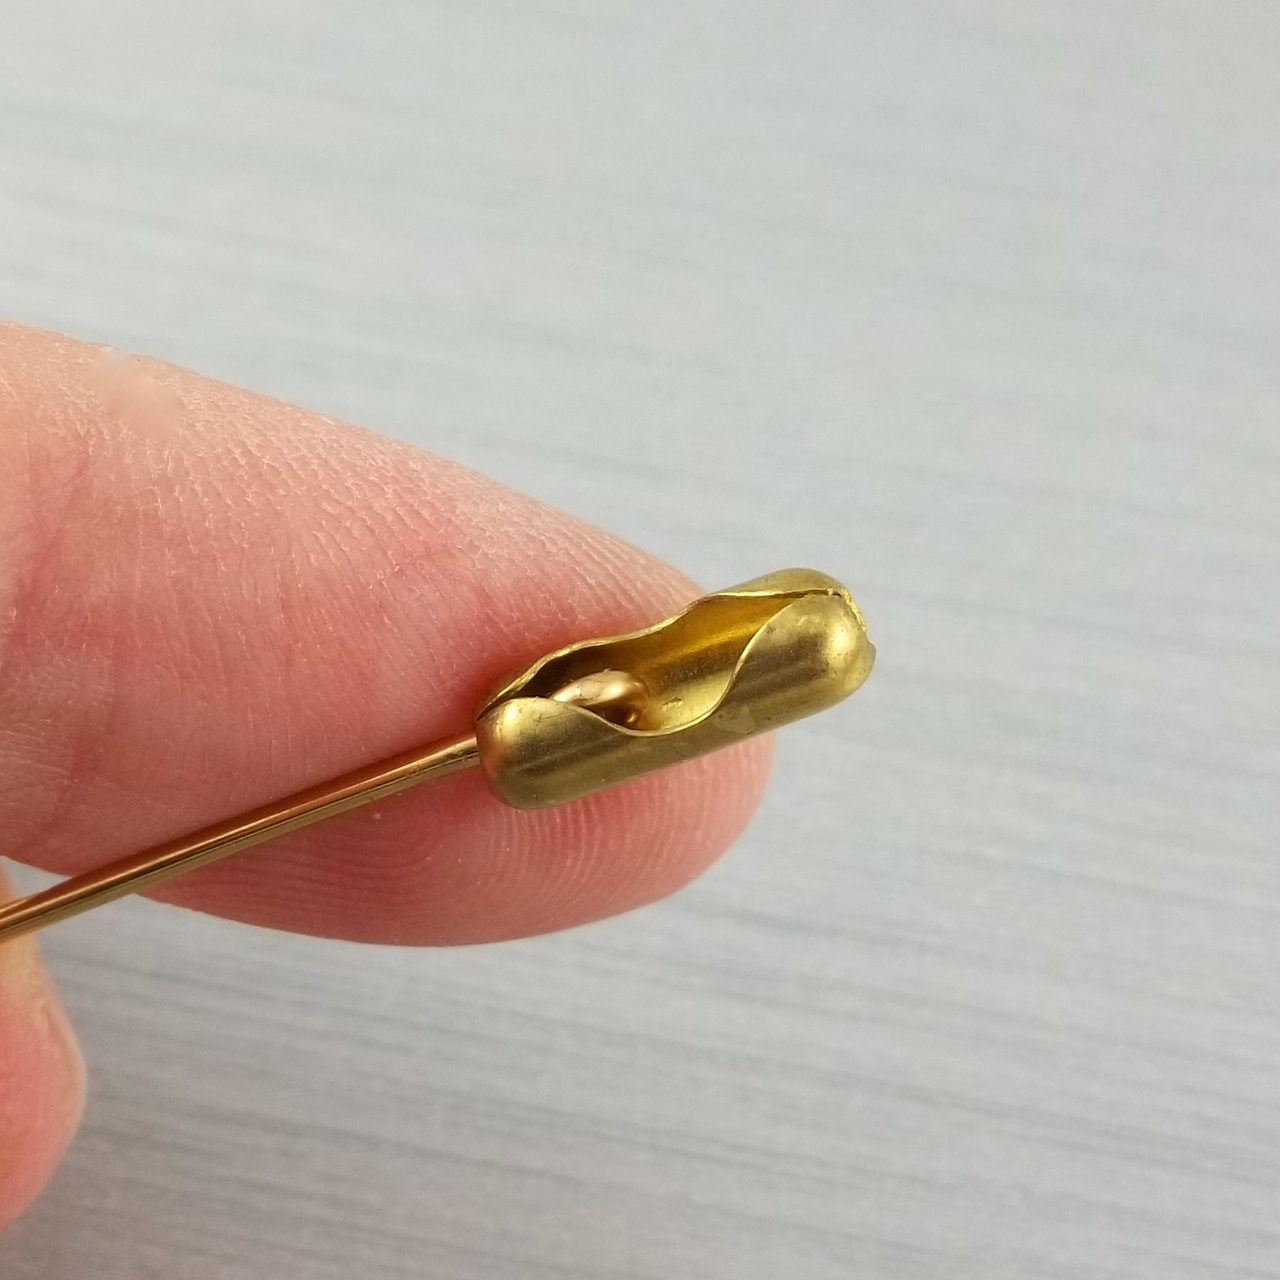
To make a ceiling fan/light pull you need some ball chain, couplings and adapters (in silver below right) that provide a way to connect your wire that is attached to your bead to the ball chain.


We had a difficult time finding the adapters and so I improvised a little and will show you a method that I use.

Supplies needed:

* A large bead with a large hole or one that you can drill a hole in at the top
* Ball chain
* Heavy 18 or 16 gauge wire in the same color to match your chain
* Two couplings that fit the ball chain
* Strong metal bead or bead cap
* Round nose pliers
* Wire cutters (heavy duty type)
* Drill bit - 5/32" or 4 mm (optional)


1.  Cut a piece of wire long enough that will go through your bead plus extra for finishing at the bottom end.  With your round nose pliers, make a small loop at the one end like you are making an eye pin.  You want a nice tight loop that will fit inside one of the couplings.  It doesn't have to look pretty as it won't be seen afterwards.


2.  Insert your wire into one of the couplings from the inside going out as shown:


3.  Attach the ball chain to the opposite end of the coupling


4.  You can make a large hole at the top of your bead before baking or drill it larger afterwards, whichever you prefer.   Make sure the hole is only large at the top part of your bead and not all the way through.  It should also be deep enough to hide the coupling end of the ball chain.


5.  Insert the wire through the top of the bead so the wire comes out the bottom end.


6.  Pull it all the way through until the coupling is hidden inside the top making sure it is nice and snug.


7.  Add a bead or bead cap to the bottom and then loop your wire.  The bead acts as a "washer" to anchor your wire and your bead on.


8.  Hang a decorative bead or dangle from the wire loop to finish it off.


9.  Attach the other coupling to the opposite end of the ball chain and your fan/light pull is ready to hang!


 Have fun and enjoy!

Sunday, March 20, 2011

Spirals are Inspiring

There is something about the spiral shape that I find myself drawn to.  When I think of a spiral pattern it  reminds me of things in nature such as seashells or snails.  I looked it up and found out that in ancient greece, the living spiral has no beginning or end and is an ongoing process to eternity.  It is considered the essence that connects all things.

Here are some photos I found that will hopefully inspire you....

Fern Fiddlehead


And these are some of our new designs from our Ebbtide series.


Friday, March 18, 2011

Our forever Yours series

I'm never one that likes sitting around and just "waiting".  If I'm standing in line at a grocery store for instance, you will find me taking advantage of the few moments and thumbing through any of the magazines at the stand that catch my interest.

I also keep a notebook in my purse for other times when I am sitting and waiting so I can constantly make lists of what I need to do or jot down any inspirations for my clay that come to mind.

The other day Dave was describing to me an idea he had for a necklace design.  We were waiting at Mr. Lube and so I decided to do some sketching in my trusty notebook I had along and this is what we came up with:


The real test was to put it into clay and we decided to name it our "forever Yours" series.


I love how things turn out just like you planned but even better.  I have a piece similar to these for myself to wear and I received so many comments on it, I think it is a keeper.

Thursday, March 17, 2011

Blog Debris Thursday

Grace from Create with Ease posted a You Tube video the other day that I found so inspiring I wanted to share it with you today.  Hope you enjoy it as much as I did!