Showing posts with label ring. Show all posts

Thursday, October 5, 2017

Large Interchangeable Snaps in Faux Stone

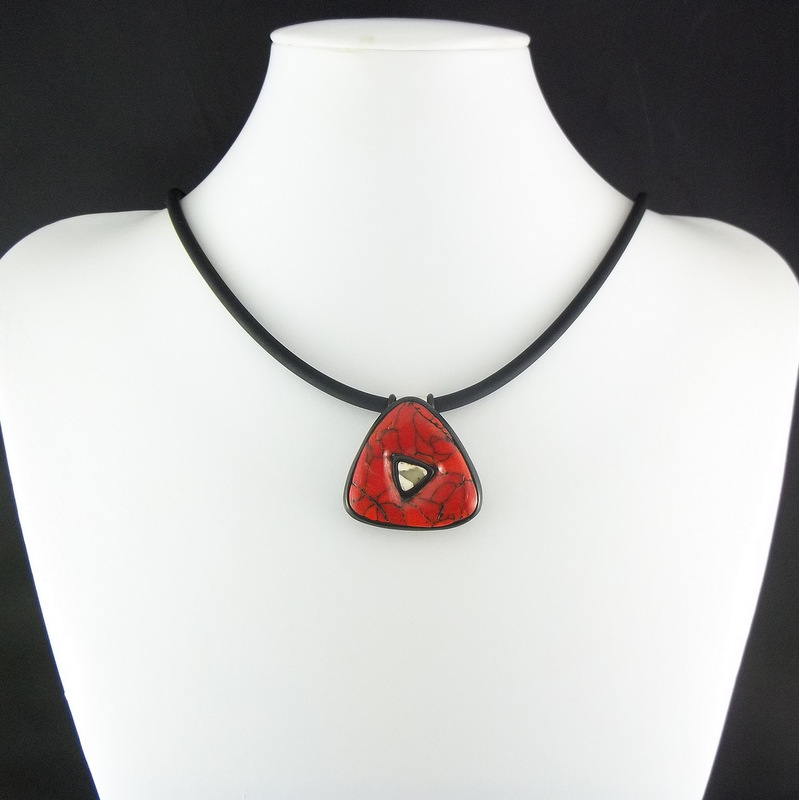
I really love creating clay designs with the CaBezel jewelry molds.  These pieces were made in our faux red stone and on a snap for interchanging to be worn in a variety of ways.  I filled the center hole in the small designs with a bit of faux white stone to add a bit of contrast.


The new 'Holy CaBezel' jewelry molds come in three sizes.  I really like the variety as even if you created a pendant from them, not everyone prefers the largest size so it provides more options.  Shown below is the smallest size of the 'Carolyn' design (my favorite -- not just because it is named after me!) that is on a snap and worn as a necklace.


Here is the same snap combined with the large size and a small 'Sue' design to create a three piece interchangeable snap necklace.


And a few more ideas as to how to use this size of art bead.  It could be used as bracelet links or in this case a snap added to one of our new wrap bracelets.


It is also the perfect size for adding to a shawl or hair stick.  We make our own clay covered sticks with a snap base for interchanging which are available in our online store as well as several yarn shops that sell our work.


And if you like chunky rings, the small size CaBezel can be worn as one as well.  Having it on a snap allows one to choose the ring base they prefer for a proper fit.  We have a selection of rings with a snap base in our online store.


So even if you aren't into making interchangeable snaps, I hope this can give you a little more inspiration on using the CaBezel jewelry molds created by Wendy Orlowski which are available only at Shades of Clay.

Tuesday, October 4, 2016

New Ring Display

A couple of years ago we made some displays from polymer clay to show off our bracelets at shows.  We found these worked really well for us and you can see them here.  This year we decided we could use a ring display and so made one using the same technique as the one for the bracelets but instead mounted all the cones on a solid base.


We have several styles of rings that all have a snap base for interchanging the decorative snap buttons.  It worked really well and allowed the shoppers to choose their preferred ring style and then select the various snaps for interchanging.


Paper cones we covered to create the ring stands


Friday, March 6, 2015

Textured Flowers for Rearranging

These flowers are another type of texture we like to work with.  Each petal is individually sculpted, textured, colored with mica powder pigments to give the metallic jewel-tone colors and then arranged into a flower.  They have a special finding on the back to allow them to be interchanged and used in a variety of ways.  We are still working on more prototypes and getting everything in order for our spring shows coming up in April and May.


Here the three flowers are arranged in a necklace ...


The same flowers can be worn in other ways such as a single pendant ...


...  as a ring ...


... or on other findings like this hair clip ...


It can even be added to a large bail to wear on a scarf ...


We are still working on some bracelet designs as well as other accessories.

Sunday, October 6, 2013

How to Wear Our Scarf Clips

Our new scarf clips are so versatile and can be worn in many different ways.  We have been working on photos to show how to wear them and now listed on our website (click here).


I love how they can also be worn as a pendant either on a scarf (shown above) or on a cord (shown below).


These clips are like the old vintage style but adding them to our clay designs give them a modern make over. We will be listing some of these in our online store soon as well as available in our upcoming Christmas shows.

Note:  If you are looking for the clip findings we used, we now have some in our online store.

Thursday, October 3, 2013

How to Attach a Scarf Clip Ring to a Polymer Clay Art Piece

UPDATE:  These scarf clip rings are no longer available.  After a long time of searching for more we finally found some but they are different than the ones shown here in this tutorial.  I have created a new free tutorial on how to work with the new clips which you will find here.


Since I first introduced our new scarf clips, we have had many requests for where we got our clip findings.


Well I am happy to announce that they are now available through Shades of Clay.


These findings are a very good quality but due to the strong spring action, we found them to be a little tricky to attach.  I thought I would share with you how we do this so here goes:

Prepare and bake your clay art piece.  If you want your piece to be curved, you can use a form when baking.  Here we used a cardboard tube to create a curve.


The scarf clip finding has a very strong spring action so it can grip the scarf.  When attaching this clip, you want to maintain as much of that "spring" as possible yet not detach itself from your clay piece while baking which it will do if not done in several stages as shown.


(1) Roll out a small piece of clay in the same color as the back of your clay piece (about 3 mm thick).  Cut out an oval shape with a shaped cutter or by tracing around the clip base.

(2) Place the clip base on top of the oval shaped clay piece and press down at the inside end next to the ring hinge.  Remove the clip from the clay and there should be an impression left.

(3) Trim the section from the oval piece using the marks as a guide as shown and then place it back onto the back of the clip base.  This is to ensure that the "spring" mechanism is allowed to move while attached to your clay design.


(4) Apply a bit of liquid clay to the back of the clay on the clip base and center it onto the back of your clay design.

(5) Apply some more liquid clay to the top part of the base making sure it fills all the small "openings".  Take a tiny piece of clay and apply it to the base pressing firmly to make contact with the clay below through the openings with the liquid clay acting as a bonding agent between them.  Bake your piece for 15 - 20 minutes and allow to cool.  Make sure the ring is "open" or "up" while baking or the spring action will force it off while baking.


(6) Allow your piece to cool.  To cover your clip base, roll out a medium-thin piece of clay and cut out a thin strip.  I like to use an oval shape cutter, trimming a bit off to fit.

(7) Apply some liquid clay to the back of your clay strip.

(8) Place it over your clip base as shown leaving enough space below the hinge to allow it to open and close properly.


(9) Close the ring and press it down then open it up again.  This is to be sure that it will close properly after your piece is baked.  You may need to do this a couple of times to double check as you smooth out the edges of your clay covering. (10)

(11) If you like to add your signature stamp or cane slice, this is a good time to do this if you wish.  Bake your piece, leaving the clip ring open (up).  If you bake it with the ring down, the force of the spring action will push the clip off when it is in the oven.


Tomorrow I will show you several ways on how the scarf clips can be worn.

You can see the post here.

Just a note:  The scarf clips work best on a light to medium weight scarf that is not too thick.  Here we are using a polyester scarf that is on the light side but not too flimsy.

Wednesday, May 30, 2012

More Floral Scarf Pins

I've been making more floral scarf pins for the summer.  Other than the sunflower pin, these have the Rivoli Swarovski crystals embedded in the center.


I've also been experimenting with different backings.  I like the clay back with the embedded metal strip but I found that part to be so labor intensive.


This pin has a heavy wire that I embedded into the clay and seems to work rather well.  The way I make my metal wire button shanks (see my Making Beautiful Buttons tutorial) gave me the idea on how to do make and embed these rings.


Sunday, March 20, 2011

Spirals are Inspiring

There is something about the spiral shape that I find myself drawn to.  When I think of a spiral pattern it  reminds me of things in nature such as seashells or snails.  I looked it up and found out that in ancient greece, the living spiral has no beginning or end and is an ongoing process to eternity.  It is considered the essence that connects all things.

Here are some photos I found that will hopefully inspire you....

Fern Fiddlehead


And these are some of our new designs from our Ebbtide series.