Showing posts with label Textured Tubes and More. Show all posts

Tuesday, February 18, 2014

Jewel-tone Double-sided Textured Beads

We just finished off a bunch of double-sided texture beads and matching rondelle spacers in some jewel-tone colors for the Jewelry Party this Saturday at the Sewing Basket where everyone will make a memory wire bracelet.


Everyone will get to pick their own beads out in their favorite colors and textures to design their own bracelet.

I noticed that Pearl Ex has come out with some new colors that are suppose to be more bright and vibrant.  I am always looking for new colors and so these should be fun to play with.  You can read more about them here on Wendy's blog who now has them for sale at Shades of Clay.

We work with mica powder pigments quite a bit and in my tutorials, Double-sided Textured BeadsTextured Tubes and More and Make Your Own Rondelle Spacer Beads, I share some tips on working with them.

One thing I do differently now is I have actually mixed some of the colors to create new colors and save them in small jars with the recipe written on in case I need to make more.

Thursday, January 30, 2014

Matching Colors

One thing about polymer clay is that once you are hooked, you start looking in all sorts of places for items you can use as tools or for adding textures. Several years ago I found this toothbrush holder and decided to use it on my table to hold some of my clay tools.  I was staring at it one day and wanted to see if I could replicate the pattern so played around and made a texture sheet from clay. 


I was using it to make some of my textured tube beads like the ones below.


Now, several years later, I decided to pull out my texture sheet and see how it would look as a button. "Antiquing" them with paints gives them a carved wood or tooled leather appearance.


I love the rich brown color of these but was thinking of experimenting with other colors.  Then I had a request from Donna's Yarn & Craft to match the teal blue color of this skein of yarn for a sweater that Elsie, Donna's mom and store partner, is knitting.


I really love this color and got carried away with making extra buttons in a variety of shapes and styles.


Sunday, April 17, 2011

Spaced Out on Rondelles

I finished another tutorial which I started some time ago.  You might recognize the rondelle beads from a post I did on the blog here several years ago where I shared my original idea.  I found it to be too tedious and time consuming after a while and since learned how to streamline my production by tweaking a few things and eliminating several steps and I can now make them in half the time. (Click on the photo below to go to it.)


In this tutorial I will show you how to make special templates from clay to use in making your own rondelles so each bead is consistent in shape and size.  You can also make them in any color you want to match or coordinate with your other beads for that perfect jewelry design.


I have also included in this lesson how to make the cube shaped beads like the ones shown here in our Bargello Bead Necklaces.


As well as how to add the rich pearl and metallic colors with mica powders.


These can be made in the same matching colors to coordinate with the beads I show how to make in My Textured Tubes & More and Double-sided Textured Beads tutorials.


This lesson is very simple to follow with detailed instructions so even a clay beginner can follow them.  You do not need to invest in any fancy equipment or tools for this lesson as I have provided instructions for making your beads with or without a pasta machine and using objects that are easily available. 

Monday, March 21, 2011

Tutorial - Making a Large Bead into a Fan/Light Pull

I've been asked how we attach the wire to the ball chain in the large textured tube beads in my Textured Tubes & More tutorial.


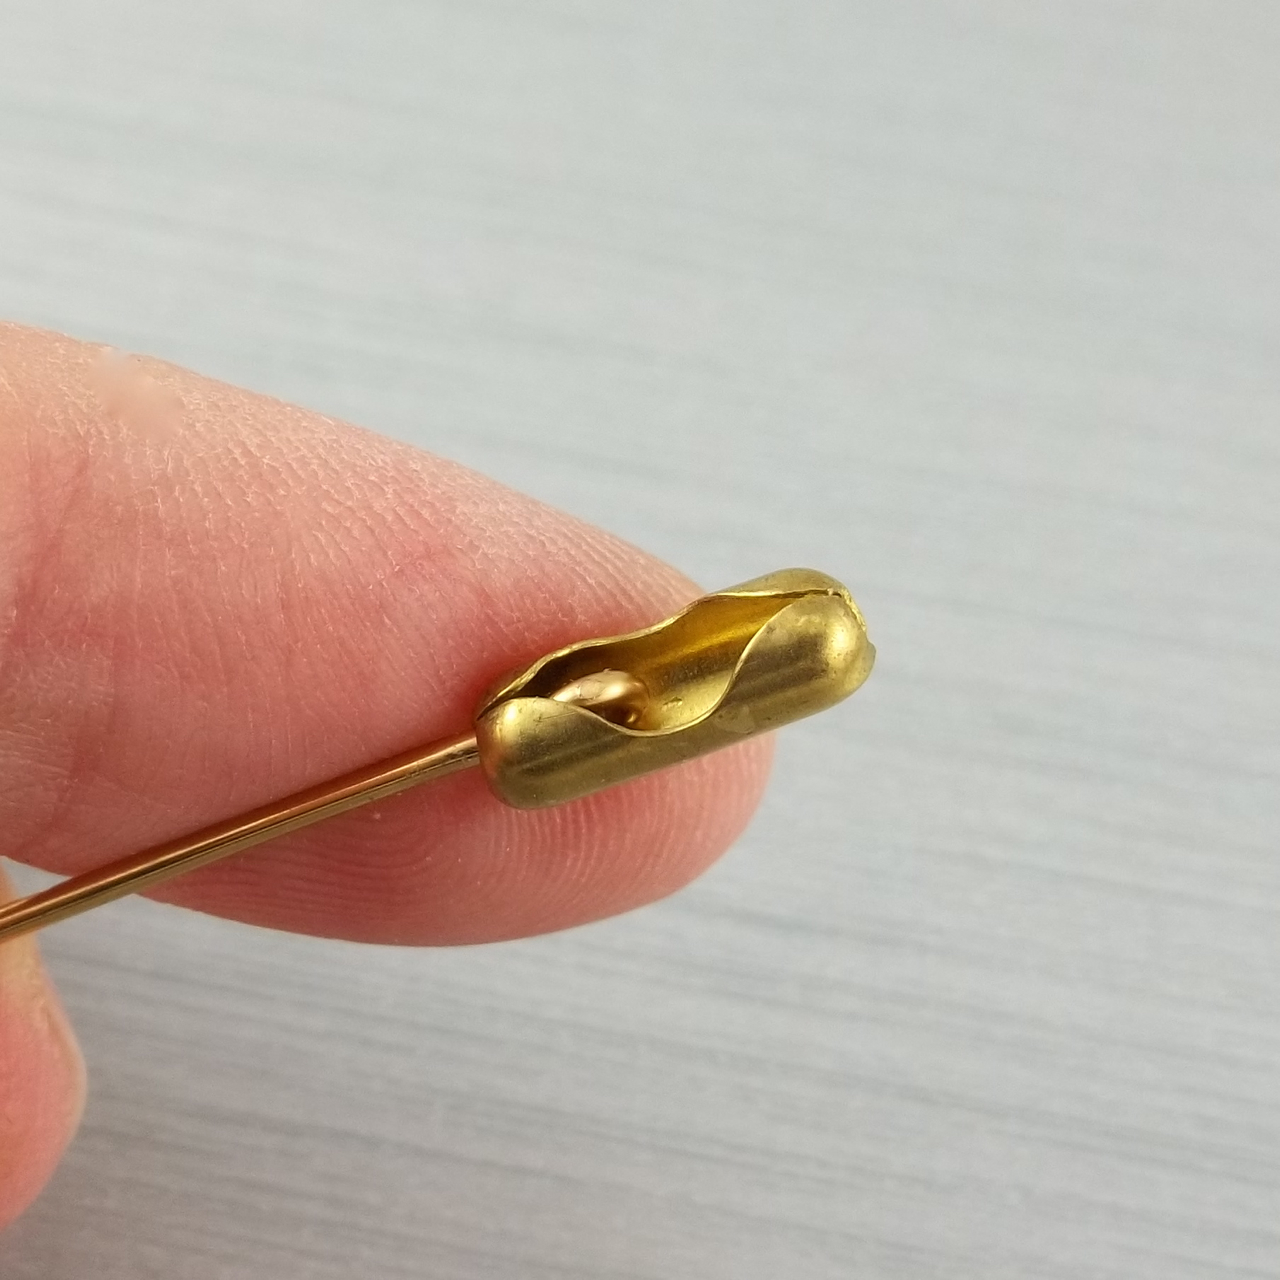
To make a ceiling fan/light pull you need some ball chain, couplings and adapters (in silver below right) that provide a way to connect your wire that is attached to your bead to the ball chain.


We had a difficult time finding the adapters and so I improvised a little and will show you a method that I use.

Supplies needed:

* A large bead with a large hole or one that you can drill a hole in at the top
* Ball chain
* Heavy 18 or 16 gauge wire in the same color to match your chain
* Two couplings that fit the ball chain
* Strong metal bead or bead cap
* Round nose pliers
* Wire cutters (heavy duty type)
* Drill bit - 5/32" or 4 mm (optional)


1.  Cut a piece of wire long enough that will go through your bead plus extra for finishing at the bottom end.  With your round nose pliers, make a small loop at the one end like you are making an eye pin.  You want a nice tight loop that will fit inside one of the couplings.  It doesn't have to look pretty as it won't be seen afterwards.


2.  Insert your wire into one of the couplings from the inside going out as shown:


3.  Attach the ball chain to the opposite end of the coupling


4.  You can make a large hole at the top of your bead before baking or drill it larger afterwards, whichever you prefer.   Make sure the hole is only large at the top part of your bead and not all the way through.  It should also be deep enough to hide the coupling end of the ball chain.


5.  Insert the wire through the top of the bead so the wire comes out the bottom end.


6.  Pull it all the way through until the coupling is hidden inside the top making sure it is nice and snug.


7.  Add a bead or bead cap to the bottom and then loop your wire.  The bead acts as a "washer" to anchor your wire and your bead on.


8.  Hang a decorative bead or dangle from the wire loop to finish it off.


9.  Attach the other coupling to the opposite end of the ball chain and your fan/light pull is ready to hang!


 Have fun and enjoy!

Sunday, February 20, 2011

More on Textured Tubes


I recently purchased a few more texture plates by Helen Breil which are so much fun to play with.  I love the deep textures and flexibility of them so I can run them through my pasta machine with the clay but had discovered they are a little too flexible to use for the textured tubes.  My Textured Tubes tutorial is available in our ArtFire Studio as well as our Etsy Shop.

Solution:
Make a copy of the texture plate with regular clay and/or the Sculpey Bake & Bend.

Tip:
If I'm going to use my texture for tubes only,  I prefer to make the texture sheet a little thicker and out of regular clay as I don't need it to be flexible.  I also don't need a large texture plate -- just an area large enough to texture my beads or a pen blank.

How:
In this case I wanted my texture to be exactly like the original texture sheet so this is what I did:

I studied the texture sheets to see what areas I would want to use and would work well for the tubes.  I then made a texture plate of that area from Sculpey Bake & Bend, using my pasta machine so I could get a deep impression.


After baking, I created another texture plate from the one I just made but this time making it with regular clay and running it through my pasta machine again so I could still keep that nice deep impression.


Voila!  I now have a texture sheet that is an exact replica of my original but out of regular clay that I can use to make my textured tubes!

And here are some tube beads I created from the new texture sheet....


These were made using a turquoise color mix called Lagoon (recipe #8-3 in Carolyn's Color System Tutorial) and highlighted with antique copper mica powder pigments.  I embedded some antique copper beads into the ends before baking like I showed in a previous blog post.

I have a necklace design in mind for these beads and will show you when it is finished.

Saturday, February 12, 2011

Textured Tube Tips

I have received a lot of positive feedback on the tutorials I've written and I'm always happy to answer any questions.  I've had some people ask if they can sell the beads or buttons they make using my tutorials and my answer is a definite "yes".  When you purchase any of my tutorials, you are free to make what I teach and sell it wherever you like.

I want to share with you a few new tips on making the textured tube beads from my tutorial.  Some people prefer not to have as large a hole in their bead and I explain in step 4 on page 3 how to prevent this.  Softer clays like Premo or Fimo tend to make a larger hole so if that is the case, then I recommend allowing your beads to rest for a few hours to firm up before texturing them.

The large holes are nice if you want to string them on thicker cords but if you want to string your beads on a thinner wire, you can "fill" in the hole at each end with some attached clay rondelles or embed some beads into each end before baking.


Here are a couple of examples showing finished pieces with metal and glass seed beads embedded into the end of each tube.


I've been experimenting with some new textures and if you find that a texture sheet is too flimsy, then try making a reverse texture plate from clay.  I had this scrap piece of fabric that was not going to work so I used the Sculpey Bake & Bend to create a texture sheet from it.  You can see my previous blog post on how to do this.   I am now able to use the texture sheet to create my tube beads.


I will show you my finished beads and more on this later...

Wednesday, November 24, 2010

Christmas at the Courthouse

We are doing last minute preparations for our next show coming up this weekend which is in the old courthouse right in downtown Kamloops.  If you click on the banner below it will take you to the website for more information.


Here are two of the pieces I showed you last week that were on my bead table that are now finished.   They are both longer designs that can be worn as a single strand or as a shorter double strand.