


I also use them for my watch bands.

First of all, you need to determine the finished length of your bracelet. Using a cloth or flexible measuring tape, wrap it loosely around your wrist. If you do not have this type of measuring tape you can always print one out. This is your wrist measurement but you do not want the bracelet to fit too tight so add a little extra to a fit you prefer.

Pick out your beads that will go between the tiles and lay them out to see how many you will need. Most of the tile beads I create have a continuous pattern so I like to keep them in order. If I need to leave any extras out, I will omit them from either end. Make sure the elastic will fit through the holes of the beads you select. I like to use a heavier (1mm) elastic for strength, whenever possible. Cut 2 pieces of elastic measuring the finished length of the bracelet plus 4"- 5" extra to allow for tying.

Thread the elastic through one side going through all of the beads. Tie a square knot.

Check the fit to see if you need to add or take out any beads. If the fit feels good, then tighten the knot. You can add some glue onto the knot for added security if you wish.
To finish off and hide the knot, take one of the end strands and thread it back through the tile bead next to it as shown in the picture below. Pull on the elastic until the knot disappears inside the tile bead. Trim off the ends by lightly tugging on the strand so that when you let go it springs back into the tile.

Repeat the above process for the other side.


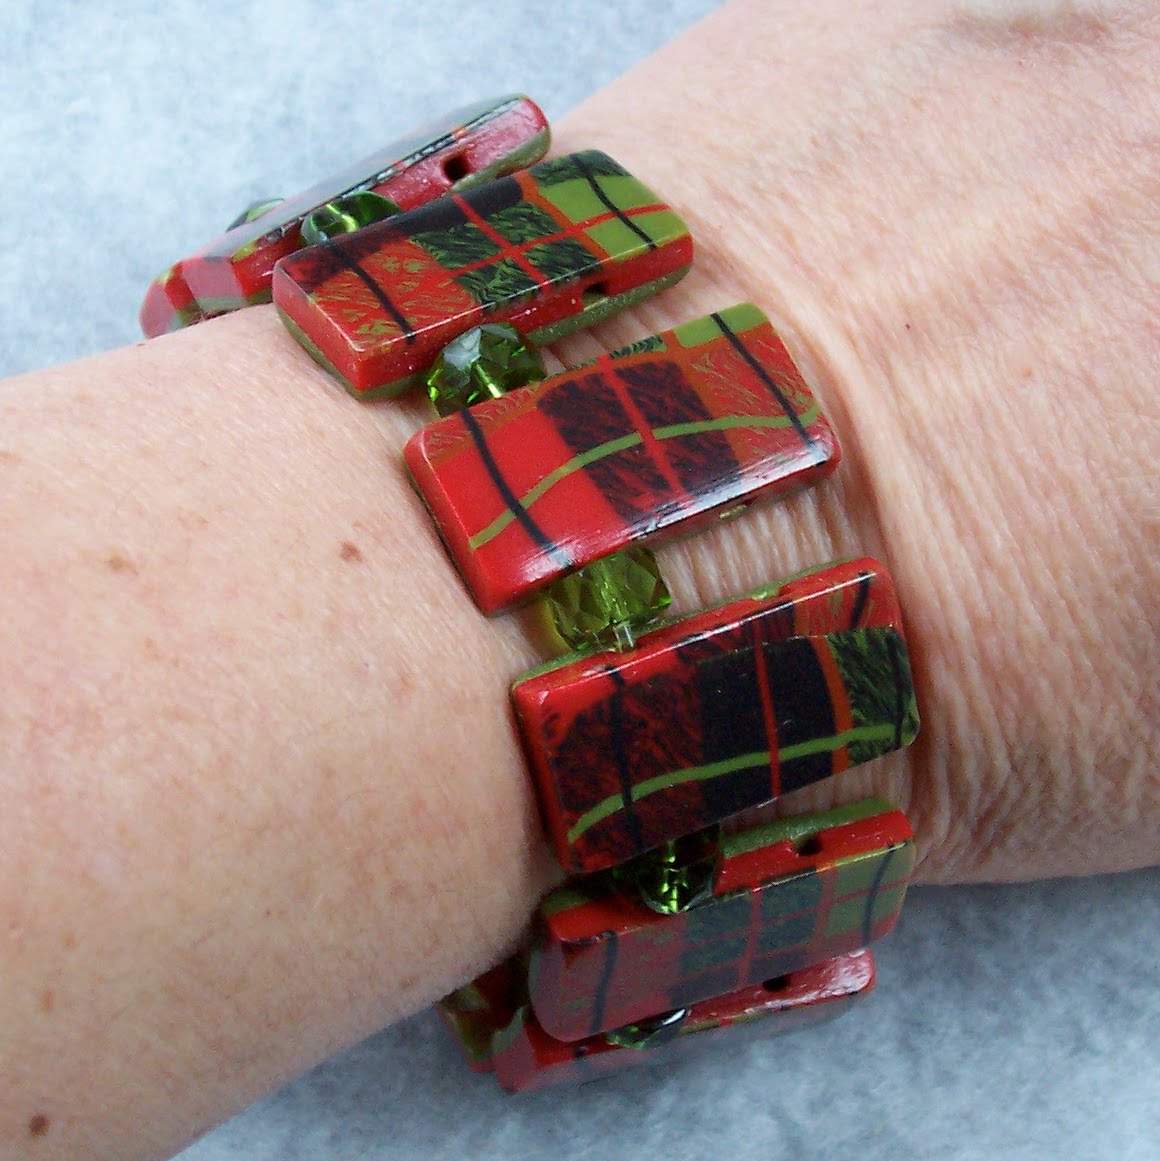
Taadaa! Your bracelet is now finished!

To switch to the reverse side, just twist inside out.

And you now have 2 bracelets in one!

8 comments:
Great tut! Very easy to follow. (And VERY lovely beads!) Thank you so much for sharing :)
You make it look so easy! I've never had such luck with tying knots. Very pretty bracelet and great tutorial. Thanks.
Thanks, I will be sharing more soon -- hopefully will be as easy to follow as this one.
I've been thinking about making a bracelet with the stretch cord. Do you have a brand preference? I'm thinking that the elastic cord that I have is a much lighter weight. Thanks for the tutorial, it looks to be very easy to follow and I'm sure I'll be trying this out as soon as I can find some heavier elastic cord.
Hi Arlene, I don't have an elastic preference as I have tried several brands. I usually buy the kind for jewelry in 1mm. I have used some .7mm for lighter type beaded bracelets where the bead holes aren't large enough to take the 1mm.
Very nice tutorial. The photos are great and your writing style is easy to follow. I've also not had great luck with tying knots but I'll give it a try.
Thanks,
Deb Groom
Do you have any suggestions on how to align the holes so it comes out straight. Do you make them before making or after?
Susan, I almost always make my holes before baking as it is much easier than trying to drill them after. Sometimes I will at least make a partial or "guide" hole and then use a hand drill later to drill a little larger. To get the holes straight, try laying your design out on something with a grid and then using long straight steel pins or wire to create the holes for stringing, then cut your pieces. There are many ways to do this and quite a few tutorials online. Hope I could help.
Post a Comment