Thursday, October 3, 2013

How to Attach a Scarf Clip Ring to a Polymer Clay Art Piece

UPDATE:  These scarf clip rings are no longer available.  After a long time of searching for more we finally found some but they are different than the ones shown here in this tutorial.  I have created a new free tutorial on how to work with the new clips which you will find here.


Since I first introduced our new scarf clips, we have had many requests for where we got our clip findings.


Well I am happy to announce that they are now available through Shades of Clay.


These findings are a very good quality but due to the strong spring action, we found them to be a little tricky to attach.  I thought I would share with you how we do this so here goes:

Prepare and bake your clay art piece.  If you want your piece to be curved, you can use a form when baking.  Here we used a cardboard tube to create a curve.


The scarf clip finding has a very strong spring action so it can grip the scarf.  When attaching this clip, you want to maintain as much of that "spring" as possible yet not detach itself from your clay piece while baking which it will do if not done in several stages as shown.


(1) Roll out a small piece of clay in the same color as the back of your clay piece (about 3 mm thick).  Cut out an oval shape with a shaped cutter or by tracing around the clip base.

(2) Place the clip base on top of the oval shaped clay piece and press down at the inside end next to the ring hinge.  Remove the clip from the clay and there should be an impression left.

(3) Trim the section from the oval piece using the marks as a guide as shown and then place it back onto the back of the clip base.  This is to ensure that the "spring" mechanism is allowed to move while attached to your clay design.


(4) Apply a bit of liquid clay to the back of the clay on the clip base and center it onto the back of your clay design.

(5) Apply some more liquid clay to the top part of the base making sure it fills all the small "openings".  Take a tiny piece of clay and apply it to the base pressing firmly to make contact with the clay below through the openings with the liquid clay acting as a bonding agent between them.  Bake your piece for 15 - 20 minutes and allow to cool.  Make sure the ring is "open" or "up" while baking or the spring action will force it off while baking.


(6) Allow your piece to cool.  To cover your clip base, roll out a medium-thin piece of clay and cut out a thin strip.  I like to use an oval shape cutter, trimming a bit off to fit.

(7) Apply some liquid clay to the back of your clay strip.

(8) Place it over your clip base as shown leaving enough space below the hinge to allow it to open and close properly.


(9) Close the ring and press it down then open it up again.  This is to be sure that it will close properly after your piece is baked.  You may need to do this a couple of times to double check as you smooth out the edges of your clay covering. (10)

(11) If you like to add your signature stamp or cane slice, this is a good time to do this if you wish.  Bake your piece, leaving the clip ring open (up).  If you bake it with the ring down, the force of the spring action will push the clip off when it is in the oven.


Tomorrow I will show you several ways on how the scarf clips can be worn.

You can see the post here.

Just a note:  The scarf clips work best on a light to medium weight scarf that is not too thick.  Here we are using a polyester scarf that is on the light side but not too flimsy.

Friday, September 27, 2013

Teaching and Learning New Things in Polymer

There are several things I love about working with polymer clay.  I love how I can create so many different colors and color blends.  I love how I can feel the clay in my hands when I work with it and how it is soothing to touch and not sharp or jagged.  What I like most of all is how it can take on so many different forms.  Many techniques I have developed myself or mastered from other ideas and have written tutorials to share them with you.  Other techniques I felt would take too long to figure out and have learned from others who have mastered those.  I have learned over the years that with the polymer community, there is plenty of sharing and exchanging of ideas.  We are all learning from each other and I believe that is how we hone our skills and grow as artists.

Before I discovered polymer clay, I use to spend most of my days sewing and had a real love for fabric and textiles.  It is so cool how one can imitate many of these looks in the clay.  I have tried various techniques and ways to imitate the Ikat fabric but with not much success.  I really liked the look that Lindly Haunani achieved with her Rainbow Ikat technique and finally decided to give it a try.  I must say that I was most impressed how it turned out the very first time.

To make the Ikat pattern that Lindly shows in the lesson, you need to start with three colored clays, a pink, blue and yellow.  I was working with the Pantone fall 2013 fashion colors at the time so decided to try those.   For my pink I used Vivacious, for the blue I used the Mykonos blue and for the yellow, I used the Pantone color Linden which is actually a green but is mostly yellow (click on each of the names to see the clay color recipes).

When working with a lesson, I find it is helpful to follow the original instructions as closely as possible.  Once I feel I get the idea as to how it works, I can begin to play around with it a bit more and experiment with different variations.  This is how one can eventually develop their own "style".  So this is the Ikat "leaf" pattern that Lindly shows how to make which I turned into a scarf clip.


And here is another scarf clip made from the same Ikat cane.


I've had many people ask us where we get the scarf clip findings.  Well I will be revealing that to you very soon and will be sharing a free tutorial on how to attach them so stay tuned.


Monday, September 23, 2013

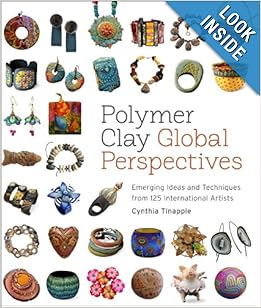
Polymer Clay Global Perspectives Book Arrived

Each year I treat myself with some new books for my birthday and this year I purchased Cynthia Tinapple's new book, Polymer Clay Global Perspectives.  As soon as it arrived in the mail and started reading, I knew I made the right choice.


The author, Cynthia Tinapple, is known for her blog, Polymer Clay Daily which is a morning read that many polymer artists look forward to in the morning with their cup of coffee to start the day.

Cynthia is a good writer and I love how she talks about polymer clay and it's history.  She has an interesting chapter on Assessing your work and how she discovered five categories that inspire artists:  The Experimenters, the Disciplinarians, the Naturals, the Socializers and the category I fit into, the Problem Solvers.

The photos are extremely high quality and a real bonus are some of the projects or tips from a wide range (125) of polymer artists from around the world.  I especially like the layout how she places the captions for the photos on the adjacent page so you get the full effect of the photos on the page opposite.

Over time I have had the opportunity to get to know many other polymer artists from around the world and so makes this book even more special to see them and their works displayed.

In you have any interest in polymer clay, I highly recommend this book.  You can order it here, OR, if you are in Canada, you can order it here.

Sunday, September 22, 2013

Winter Shimmer

Here are a few more necklaces that remind me of winter.  I enjoy working with color more than black, grey or white but we find this color combination is the most popular as it goes with nearly anything.  The plus of wearing a piece that is more "neutral" is that you can wear it with almost any color.


Thursday, September 19, 2013

New Jewelry Pieces for Fall

I love this time of year where the evenings are cooler and fall is right around the corner.  It seems easier to get more work done in the cooler weather as opposed to those hot lazy summer days.  We've been working on some new buttons and jewelry pieces in fall colors and designs.

"Desert Reflection"


"Desert Sunset"

Saturday, September 14, 2013

Show Displays and Set-up Tips

Christmas season is coming and I know many of you, like us, are preparing for the shows and markets.  We do not do very many shows thru the year but the ones we do, we take extra care and planning for just the right set-up.  Each show we end up investing in a few more necessary props to give just the right look.  I thought I would share with you a few tips to give your booth a little something extra that will reward you with extra sales.

The first thing we do is work out a lay-out of our set-up.  We just use the word program on our PC computer, drawing shapes in the measurements of the tables, grids and other display props we use.  We can then move them around to fit in the space size we will have in each show we are in.  This is the drawing we did up for the Art Walk last weekend with photos of our space to compare.


Notice the mannequins and battery powered lighting

Colorful scarf jewelry
Notice our store bought and handmade papier mache mannequins on the grid as well as the large life-size mannequins in the front and back of the booth.  We have tried various ways to sell our necklaces but this is the best way we have found.  You must give each necklace it's own space.  Do not cram them close together.  Also note, the bracelet cones, we sold more bracelets than ever before using this display prop.

You never know the availability of electricity so we always carry battery powered lights, as in this past show.  We consider this tip to be so important as any jewelry does not sell without proper lighting.

We usually put up more signage than we were allowed to this time.  We create our own on our computer with large photos of our work and have them printed out at Staples, who we have found to be very professional as well as economical.  You can have them mounted on foam core or do it yourself for less.  These large posters pay for themselves as they not only attract customers but good photography will sell your work better than a 10 minute spiel.

Notice how we put the most colorful feature of our booth (the Scarf Jewelry) at the front and center.  It attracted people into our booth as they walked by.

Lastly, Square Register helped so much with sales because it was quick and efficient.  It is also a unique gimmick that customers found fascinating.  Believe it or not, we made two additional sales just so the customer could see us swipe their card again!

The credit card swiper that works on your phone or tablet is free and there are no contracts or monthly fees.  You only pay a low fee per transaction.


The cool thing with Square Register is that you can set up a "library" of your items and even load photographs with prices on your computer so you do not have to enter everything manually when you are selling.  We also not only used it for credit card charges but for cash transactions and keeping track of our inventory so we know exactly what we sold at the end of the day.  We could also text or e-mail a receipt to the customer if they wished.

In fact, we found this to be such a great asset that for our next show, we are purchasing another square register for our tablet and get an additional person to help with the "cash register" for quicker sales.

I hope these tips were helpful and just want you to know that we weren't paid in anyway for promotion of any of the companies or products I mentioned but just sharing with you as happy customers.

Monday, September 9, 2013

Follow Up on the Lake Country Art Walk and Our New Bracelet Display Stands

We had the most wonderful time at the Lake Country Art Walk last weekend.  It was our first time in this great art show and the experience was wonderful.  It was a little overwhelming at times with so many people but everyone was so patient and extremely kind and pleasant.  With all the crowds we were very fortunate to have our sister-in-law, Pat Good give us a hand and our good friend, (I wish I got a picture as she looked so gorgeous in her artsy dress) Denyse Pyke, help out as well.  We would have been totally exhausted and perhaps not survived the two days as well without them --- thank-you!

Pat and Dave taking a break...
My voice was getting hoarse by the second day from talking so much with demoing the clay and explaining how we create our pieces as polymer clay is a new art form for many that were there.

Just a follow up on my last blog post where I showed how we made our new bracelet display stands. Not only did the bracelets show off nicely and we could arrange them in different spots.  They must have worked well for us as we sold more bracelets than in any other past show.

Here are a few snapshots of our set-up.

bracelet display stands on table and above on grid.