Sunday, October 11, 2009

Snowflake Cane Candle Collar


Here is a candle collar (bobeche) I made with my snowflake canes.  I'm in the process of doing more with it in between all my other projects I'm working on for the upcoming Christmas shows.


Monday, October 5, 2009

Snowflake Cane Tutorial

Fall is here and winter is coming on.  We've been busy preparing for some Christmas shows coming up soon and so I've been busy creating things with winter and Christmas themes.

I was thinking of making a snowflake cane and had been looking around for various ideas.  One of my ways of getting inspiration is going through magazines, flyers and colorful brochures.  I will tear out photos that grab me for one reason or another and sort and file them for later reference.  While going through one sales flyer a photo with a snowflake (shown below) got my attention and I could easily visualize making a cane from this design.


I started with a blue colored clay that has some pearl in it for a nice sheen.  You can also use a transluscent instead but the blue is easier to see in the photos.

1    2 
1.  Form your clay into a round plug about 2" in diameter and 1-1/2" high.  Cut the plug in half down the center.  Separate the halves and make cuts into each piece making both sides equal as shown in the photo.
2.  For the snowflake "veins" I used a mixture of half white and half pearl clay and rolled it out on the #2 setting of my pasta machine which is the second thickest setting.  Cut pieces in the following sizes to fit into the cut areas (see photos 2 & 3):
    2 pieces 1/4" wide  x  1-1/2" (height of you cane)
    2 pieces 3/8" wide x  1-1/2" 
    2 pieces 1/2" wide  x  1-1/2"
    2 pieces 5/8" wide x  1-1/2"
Pinch and taper one side of the long edge of each piece (pic 2).

3    4 
3. Place the white pieces between the blue clay as shown in photo 3 with the tapered ends facing up.
4. For the center vein, use a double thickness of the white/pearl clay and cut a piece 1-1/2" x 1-3/4".  Pinch and taper along the 1-1/2" edge on one side (pic 4).

5    6 
5. Insert the center vein lining up the squared end at the bottom and the tapered end at the top.
6. Press the clay together into a tight round plug again.

7    8 
7. Reduce the cane to about 14" or longer.  Trim off the distorted ends.
9. Cut the remainder into 6 or 8 pieces -- depending on how many sections you want to use.

9 
9. Pinch the top end of each cane piece like forming a flower petal or leaf.

10   11
10. For the snowflake center, make a bulls eye cane with blue as the center (3/8" or 10 mm diameter) and wrapped in the white/pearl rolled out at a #3 PM setting (3rd thickest).
11. Arrange the snowflake cane pieces around the center matching up the stems so they line up and touch the center white.

12   13
12. Fill in around with more blue clay, packing it tightly.
13. Wrap the cane in a sheet of blue clay.

14   15
14.  The cane is now ready to reduce.
15.  Here are my snowflake canes reduced down to several sizes ready to use.

Friday, October 2, 2009

A New Wrinkle on Things


I've been experimenting with my plaid cane and came up with this set that looks like draped tartan plaid cloth.  I've been thinking about new styles for my earrings and pendants than the same usual round shape.  I had my cane slices laying on my table and it suddenly dawned on me -- why not actually make it look like real cloth?


To do this I slice a thicker piece off my cane and smooth it out.  I then texture it to look more like a cloth.  I like to use the mesh bags from veggies but real cloth with a nice open weave also works well.  I just spritz my cane slices with water and place them between a double layer of the mesh and gently apply pressure with my roller.  I then flip it over and do the same for the other side.

I added touches of gold mica powder to the edges and the back of the pendant and the edges of the earrings.  To create the folds or wrinkles, I tuck wads of paper towel underneath for support while baking.


I coated them after with some satin Diamond Flecto Varathane to protect the mica powders from wearing off and to add a nice rich sheen.

I wore my prototype set (below) out the other day and had many looks and positive comments.


Monday, September 28, 2009

Mokume-gane


Mokume-gane, meaning "wood-grain metal", is a Japanese metal smithing technique where layers of different types of metals are compressed and fused to create beautiful patterns.  This is another technique that we like to imitate with polymer clay as it can be done in so many ways with a wide variety of color combinations.

After selecting my clay colors, I make them in sheets all the same size, varying the thickness depending on the color, and then stack them.


I roll out and compress my sheets so they will fit through my pasta machine.  The stack is put through the pasta machine to compress them even more.  It is cut in half, stacked, compressed and rolled through the pasta machine again.  This is done one or two more times, sometimes adding silver, gold or copper leaf in between towards the end of the process like in the blue bracelet shown above.


The next stage is to impress the layered clay to create a pattern.  Here I've used a texture sheet with a floral design.  I have to use some sort of mould release so it won't stick in which I simply spray on water.


Using a special blade, I shave off the raised areas that the texture sheet created, revealing a pattern underneath.  I then flip these shaved pieces over and arrange them onto another sheet of clay creating a second design.


When I have my sheets the way I like them, I smooth them out with my roller and now they are ready to use in my designs.  Here I have some tiles ready to bake for my mosaic coffee table.


And more tiles that have been sanded smooth and ready to use.


Or how about some pendants...


Thursday, September 24, 2009

Making a Plaid Cane


I love all kinds of tartan plaids, especially the ones in rich colors so I've been experimenting with different ways of imitating this warm fabric in my clay.

Here are several online tutorials I've come across on the internet:

Plaid Cane  by Polymer Clay Express

School Spirit Cane by Lisa Clarke at Polka Dot Creations

Violet Tartan Plaid Cane  by  Kro K Do  (in french)

Plaid Cane by Dora's Explorations

I decided to give Dora's cane tutorial a try and I must say I am impressed with how she worked this complicated type of cane out.  I followed her instructions choosing peridot green, olive green and dark red as my three colors.  I really love how it turned out but I found the colors came out a little darker after baking than what I was aiming for.  I also have to agree with Dora that it is very difficult to keep the lines straight while reducing the cane.  I have an idea I want to try for my next attempt and will keep you posted.


Monday, September 21, 2009

Flowers for Fall

I love this time of year when the days are warm but not too hot and we become surrounded with all the colorful autumn leaves and fall flowers.  I'm working on some new fall colors and this is a bangle that is now listed in our Art Fire Studio.  I came across these gorgeous metal bangles some time ago.  They have a strong spring hinge on them so they stay closed while wearing but are easy to put on and take off.  Unfortunately I only have one size in stock and they fit a small to medium size wrist.  The inside measurement is 6-5/8".  


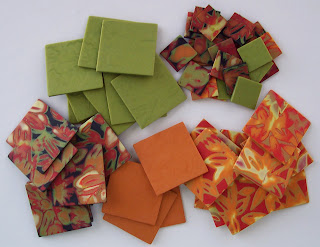
Of course if you would like to make your own bracelet, this tiled bead set is for sale in our Etsy Shop.  There are 7 tiles -- plenty for a gorgeous fall bracelet.  It is also reversible so if you want a plainer look, there is a quilted look texture on the opposite side in the matching warm fall colors.  I strung some beads on to show how they can look.


Saturday, September 19, 2009

My Birthday Present Has Arrived!

Yeaah!  My books arrived in time for my birthday!  I came across the Making Polymer Clay Beads by Carol Blackburn some time ago and fell in love with it.  The photos are fabulous and it is full of so many inspiration ideas.

I was hoping to receive the Polymer Clay Color Inspirations sooner but it wasn't available in Canada until over a week later than the U.S. but I wanted to order it from Canada and save on shipping.  We are really impressed with this book and even though I have a fairly good grasp on mixing colors I feel there is always something new to learn.  I can tell already that this book will be a coffee table favorite when it isn't in use in my studio!