Showing posts with label light box. Show all posts

Tuesday, July 30, 2013

New Sewing Area

I really love the studio that Dave and I created in our home.  There are three large working tables plus a corner unit for baking.  No matter how much space one might have, however, there just never seems to be enough which is a good reason to keeping it tidy and organized.

The only thing missing in our studio was a sewing area.  My sewing machine and serger were basically stored away, under one of the work tables and then pulled out as needed.  I really wanted to use them more so I came up with a plan.  First I had both machines serviced as it had been a while.  Bill at Heather's Fabric Shelf did an awesome job of cleaning and tuning them up and now they just hum and purr.

Next was to create my own sewing area space and so started my search using Pinterest.  If you aren't hooked on Pinterest yet, you do not know what you are missing!  It is such a great way to get all sorts of fun ideas.  If you are looking for some cool ideas to fine tune your studio, you can check out some of my Pinterest boards and follow them if you wish.  I have a board on "Studios" and another on "Getting Organized".  Some of the ideas may not be for a polymer clay type studio but many of the ideas could still be applied.

And so this is where my new sewing area is ...  Taa daa!


That's right ...  believe it or not, it is hidden away in the closet.  And since it is the closet in the studio, it is even handier.  I never thought about it before until I came across a few on Pinterest so started searching closet studios or closet sewing areas further and found so many cool ideas.  So I thought, why not make more use of the space we already have and I love how it turned out and everything just seemed to fit!


Here is my sewing area that fits nicely on the one side.  The desk we had fit perfectly in that space.  We happened to have a piece of pegboard that Dave hung on the wall for me.  My large thread spools for the serger fit on a shelf at the top.  The other important factor with having an area like this is proper lighting.  I managed to easily hook up two Ott lights so the area is nice and bright.  The one Ott light clips onto the corner shelving so it is out of the way.  I've had this light for several years but never liked the way it clipped and always felt it was so awkward but it has finally found a suitable spot.


The other Ott light hangs right on the pegboard!  


The drawer in the desk holds all of my thread so I can easily see all the colors.


Besides all the work area,  I still have the shelves on the side and above for storage. 


So that was just half of the closet and this is what I did with the other side: 


Our photo light box fits inside on some shelving.  I love how it is out of the way and frees up more counter space.  And because I have a power bar in the closet for the lights and sewing machines already, the light box can plug in as well.  Above are fabrics for sewing hung on skirt/pant hangers -- another idea I picked up on Pinterest.  The hanging closet shoe shelf just fits down the one side for storing other items such as more fabric and odds and ends.

So now I not only feel the studio is more organized I have a lot more counter space freed up and I can sew when I want without the hassle of pulling my machines out and setting them up every time.

Friday, January 8, 2010

Photo Testing

I've been experimenting with taking photos with my new light box and comparing them with the ones previously taken in the natural light.  Here are a few samples below:

Natural Light              Light Box


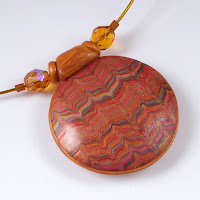
The first photo is of a pendant that I have had a hard time trying to capture in it's best form.  It would  reflect the light and the colors always seemed to appear washed out.  Both photos were taken on the same white paper background and neither one had any editing done to them at all.

The black and white earrings were also difficult to photograph in the natural light.  One nice thing about this particular light box is that it comes with a background cloth that is reversible with blue on one side and grey on the opposite.  I used the grey background for the earrings as well as the tiger print beads which give them both a much softer look.

These are the pros and cons that I have come up with so far:

Cons:
It takes a bit of space so you need a good place for it.  The inside measurements are 16" x 16" x 16", however the complete outside setup measures 21" deep x 25" wide.  Although any light box you choose will still require a bit of table space and extra set-up for your lamps (this one the lights are built in).

Pros:
1)  The inside is big enough for using an average to tall size jewelry display.
2)  I can take my pictures of my work any time of the day or night and I don't have to worry about whether it is a sunny or cloudy day.
3)  The photos I take are more consistent so I won't have to fidget with adjusting my camera settings as much and also means saving time on the computer later with having to make further lighting adjustments.

I only tested it out for one day but all in all I am happy with my light box so far and I think it is definitely a keeper.

Thursday, January 7, 2010

My New Toy

We bought a lightbox today.  It happened to be on sale and I can't wait to try it out tomorrow.


It is suppose to help with taking better photos.  I feel our photos aren't too terrible but there is always room for improvement.  When we set up our new studio last year we had windows placed in the corner where there is no direct sun but plenty of natural light.


This was working out fine, however there are only certain times in the day when the lighting is the most optimal for picture taking and the photos weren't as consistent as I would like.  I'm hoping this lightbox will not only improve my photos but also help save me some time in editing afterwards as well.

So we will put it to the test and see....