Thursday, September 30, 2010

First sights of the Spawning Salmon

It was a gorgeous sunny day when Dave and I delivered our art pieces to the gift shop at the Adams river park yesterday.  We took a stroll down the path and over the several bridges to see all the salmon that were spawning and what an awesome sight it was!  The fish were much larger and more majestic than I imagined they would be.  I love their rich red and green colors they transform into by the time they reach their spawning grounds.  The fish were very active, splashing about and literally jumping out of the water.  Both male and female will guard their eggs until they eventually die.

The whole experience was very awe inspiring and with it only taking place every four years is quite exciting to not only see it up close and personal but to participate in such an event is a real privilege.  Here are a couple photos I took of the fish while there.


Wednesday, September 29, 2010

Return of the Sockeye - Ready or Not!

After a few set-backs this past week with Dave in the hospital for four days, we still managed to have over 100 pieces of various items finished and ready to sell at the Salute to the Sockeye Event.


There is a log cabin at the local provincial park where the Salmon society are setting up a gift shop with various items from local artists.  We provided all sorts of goodies to sell including pens, magnets, jewelry, and even switch plate covers.  I created a good amount of spawning salmon pieces as well as other nature themed items.  Here is a photo of our display set-up --.  They are still working on getting the gift shop ready for it to open this Saturday so I will have more pictures for you later.


Here are some of the items we created for this event:


Wednesday, September 22, 2010

Totem Inspired Salmon Pins

Here are some more salmon pins I've been making in a different style to sell at the Salute to the Sockeye at Adam's River this year.  The technique is a spin on Julie Picarello's "lizard tails" and even though each fish was created individually in the same way, no two come out exactly alike.


They are in the same bright red and green as the spawning salmon as they turn this color by the time they reach the end of their trip where they spawn.  This style was inspired by the first nations native style art in our area.  The spawning grounds where the salmon return to is very important and sacred to them.  The salmon symbolize dependability and renewal as well as a provider of food.

Monday, September 20, 2010

Preparing for the Return of the Sockeye

I've been in full production these days preparing for the Return of the Sockeye  starting October 2nd.  There was an abundance of salmon this summer -- (millions) -- out in the Pacific ocean and a good amount of those are heading our way inland to spawn in the Adam's River.   We were fortunate to be juried into the local artisan gift shop they have set up at the log cabin there each year.  Thought I would show you how my spawning salmon pins are put together -- each one formed by hand so there are no two alike.


Thursday, September 16, 2010

Learning New Techniques

I like to work with a variety of techniques and always open to learning something new.  I don't have a favorite but, after all, they say variety is the spice of life.

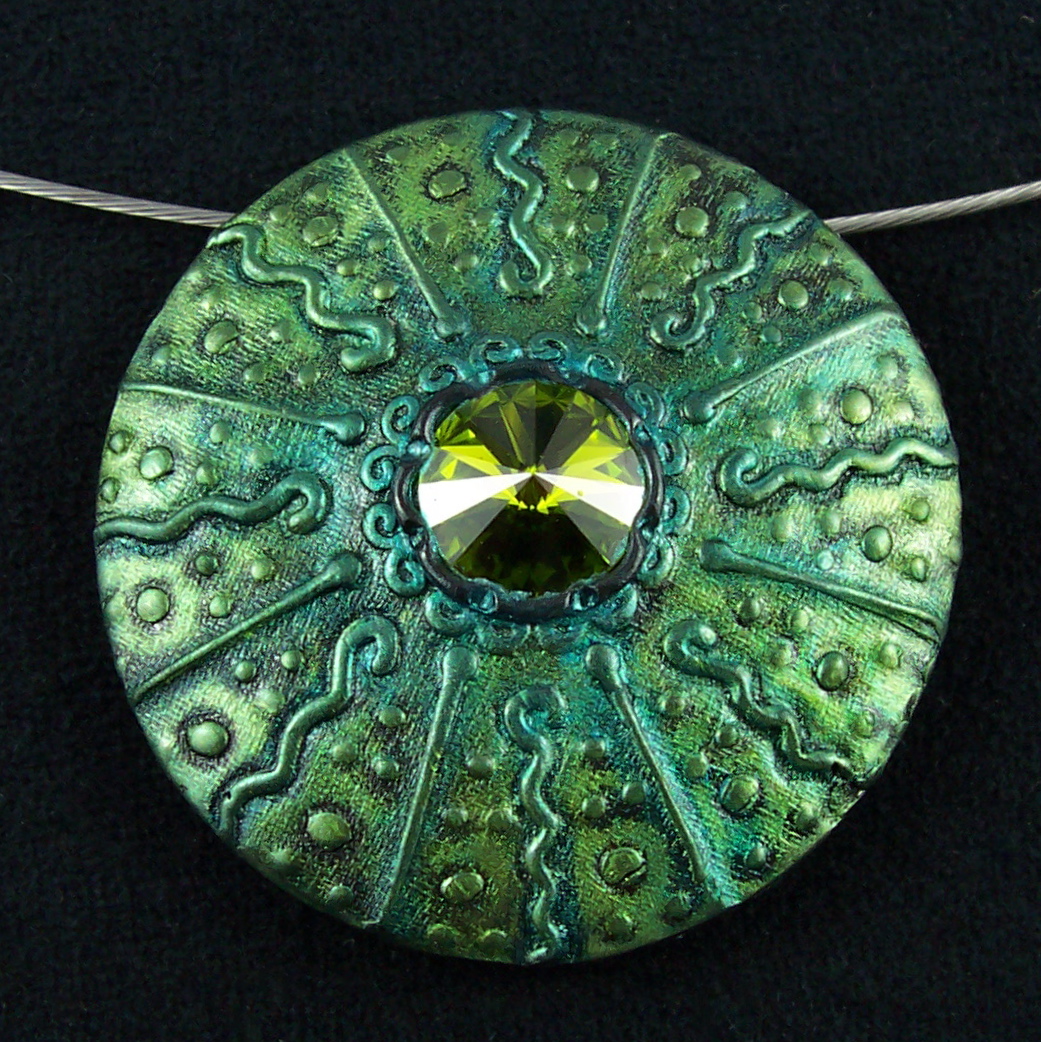
I'm constantly drawn, however, to textures and what you can do with them.   Helen Breil is a fellow Canadian artist who's work I truly admire.  She has a different style and I love how her jewelry art pieces are created from her own textured designs.  I purchased her recent Radiating Lines tutorial which I found very fascinating and couldn't wait to try it out.

This is the first pendant I made experimenting with my own texture plate I created.  I had the prettiest rivioli crystal in my favorite green which I used for the centre point.


I had a lot of fun making this pendant and I plan to explore this technique a little more and develop my own style.  I'm always looking for work that will coordinate with my double-sided and textured tube beads.  I will be sharing more on that in the future.

Monday, September 13, 2010

New Beads - Double-sided Textured and Pearl Rondelles

I've created some new beads using my double-sided bead technique which are now listed in both our ArtFire Studio and Etsy Shop.  If you want to learn how to make these fun type of beads, we have a tutorial available that will teach you how.  They are a lot of fun to make and the designs are endless.

These are our Funky Swirl Beads in a choice of five yummy colors.   The fun stretch bracelet shown is in the Purple Orchid (Pantone fall 2010 color) beads and include some of our new larger-size 10 mm rondelle spacers in the same matching color.


Another new series listed are the Vintage Rose in both dark and light tones.


And here are some fun jewelry pieces created with them:


The rondelles on the bracelet and necklace are part of our new pearl collection.  I have been working on perfecting our rondelle spacers and these ones have mica powders applied that match the textured beads. The luster on them is extremely deep and rich looking and they come out super smooth.


These three colors were the first ones I created and now I'm on to experimenting with more. 

Saturday, September 11, 2010

Basket Weave Texture

Ever since I discovered how you could create your own moulds and textures from clay, I've been on the lookout for any interesting object to use in this way.  Some time ago I purchased this toothbrush holder at a dollar store to hold some of my clay tools on my work table.  What really caught my eye was the cool woven texture on the sides.  It had been sitting on my clay table and I finally put it to use yesterday and made a texture sheet from it.  When I make texture sheets I like to use the Sculpey Bake & Bend.  If you make it as thin as possible where you still can get a good impression, it can hopefully fit through your pasta machine afterwards since it is very flexible.


I was wondering if this texture would work for the textured tube beads and couldn't wait to try it out.


They came out not too bad.  I created some with mica powders and the others I antiqued with burnt umber paint.  I wanted to see which effect turned out the best.  I think I like them both since they have two totally different looks.

For more ideas like these you can check out my tutorial, Textured Tubes & More...