Showing posts with label diy. Show all posts

Friday, November 3, 2023

Snowflakes . . . in a Snap!

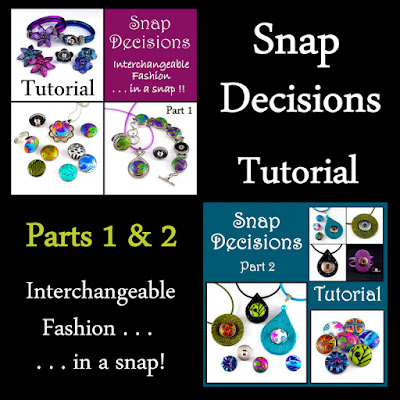
Get ready for the holidays with some fun snowflakes.  My seasonal "Snowflakes . . . in a Snap!" tutorial is once again available for sale.  This is a follow-up lesson to my "Snap Decisions" tutorial (part 1) which you would need to understand it.


Right now, with the purchase of both parts 1 & 2 of my Snap Decisions tutorial (with or without the starter kit), you will receive the Snowflakes in a Snap tutorial at no charge (value $10).  It will be emailed out along with the Snap Decisions tutorial after purchased.  (Click on the photos below to see more about the tutorial and tutorial with starter kit.


And there is another bonus!  The Snowflakes in a Snap lesson is available in pdf format that is sent directly to the e-mail address provided when purchased but is also available with a free bonus starter pack which includes some blank snaps, a beautiful snap pendant, a rhinestone snap ring, 30 hot fix crystals and a snowflake charm for create your own mold.


To receive this bonus starter kit, just purchase this snowflake tutorial with a minimum of $50 from my Snap Supplies category (including clearance and after any other discounts are applied) at the same time.  Mention the starter kit at the check-out in the comments section and if you have a preferred crystal color rather than mixed. Shipping charges will apply for this bonus offer but we do offer free shipping with a minimum amount.  You can see our shipping charges and policy here.


Sunday, July 16, 2017

Christmas in July Special

I know it is hard to think about Christmas in the middle of summer. Here in our area we have had extreme high temperatures and with several major forest fires in the distance, we are almost wishing it was winter!  But if you are making items for  Christmas gifts or to sell at your Christmas shows, now is the time to start if you haven't already.

We are having a limited time special to go along with your creating.  With a minimum purchase from any of our supplies in our online store, you will receive a credit to use towards any of our tutorials.  The amounts that you will receive are based on your total purchase which is listed below:


Purchase $50* total from our supplies section:

Receive a $10 credit to use towards
any of our tutorials!

---------

Purchase $75* total from our supplies section:

  Receive a $15 credit to use towards
any of our tutorials!

----------

Purchase $100* total from our supplies section:

  Receive a $25 credit to use towards
any of our tutorials!

----------

* (Order total is after any discounts
or coupon codes that have been applied)

-- No coupon code is needed -- 
Special applies to anything in our Supplies Section

** That includes all jewelry making supplies
and even buffing pads! **

A coupon code to be applied towards
any tutorials of your choice will be sent directly
to the shipping e-mail address that is provided
after your order has been processed.
---------

We are now stocked up on lots of supplies and have put together some new kits in our Snap Supply Section!  We have also brought back our Snowflakes in a Snap tutorial but in a special package so you can start making your own snowflake designs early this year!


We have other new kits listed including one for rings, earrings and much more!  See all our snap supplies in our snap supply section in our online store.

Snap Base Ring Starter Kit

Snap Base Earring Starter Kit
So shop early while we have lots of inventory and get a head start this year with some extra savings!


Wednesday, July 5, 2017

Make Your Own Interchangeable Snap Bracelet

We have these cool bracelet clasps in our DIY Snap Supply section of our online store that have a snap for interchanging.


I suddenly realized I never did a tutorial on how to make your own bracelet with these and even though it is quite simple I thought I would give you a mini tutorial here with a special bonus offer!

These clasps come as a two piece set.  The main part with a snap base for interchanging your art snaps and a slider that keeps the bracelet closed while wearing.


To create your own bracelet, you will need some cord that is 6 mm thick and 14"-16" long, depending on your wrist size.  15" (36 mm) is good for an average size wrist.  I have a small wrist and so my cord length is 14" (34 mm) and you can cut it 16" (38 mm) or longer for a larger size wrist.


Fold your cord in half and slide on the slider piece.  Slide it up towards the folded loop making sure that the ends are even.


If your cord has a seam, make sure the seam is to the back or bottom of your bracelet so it is hidden.


All that is left now is to glue the ends of your cord into the snap base.  I like to use a gel type super glue.  The Loctite brand is exceptional as it is quick drying and holds really well!  So add some glue directly to the inside of the snap base end as shown (rather than on the cord as it is less messy this way).  Insert your cord ends and hold for a few seconds until it is secure.  Note:  Because this glue is fast drying it is good to make sure your cord ends are already straight and lined up ready to insert before adding the glue.


Once the glue is dry, your bracelet is now ready to wear!

A - open the loop by pulling back the slider
B - place the loop over the snap base and fit it in the groove
C - Push the slider up to hold it in place
D - Snap in your art design and wear!
We also have Necklace magnetic front closure clasps with a snap that take the same size cord and you can create a matching set.  My tutorial to create the necklace is here.


And for a limited time, we have a special bonus offer.  Purchase some of the snap base clasps and receive some cord at no extra charge to make your own bracelets or necklace.  This cord is a super soft Ultra-suede in black with a copper brown heart pattern.  You will see the bonus packs in our DIY Snap supply section in our online store.


Wednesday, June 28, 2017

Displaying our Larger Size Snaps and Other Items

We are always asked how we display our work for selling in stores or for shows.  Many are surprised when we tell them we make all our own cards and print them on our computer.  We find this method the best as we can make them in any size or shape and as many or few at a time.  Now we create even more complicated ones that are cut out with our Silhouette Cameo machine.


But you don't need a fancy machine to make your own cards and this is our latest method used for selling and displaying our interchangeable art snaps.  These ideas not only work for snaps but can also be applied to other pieces such as brooches, earrings and even buttons!

You can see a previous post here where we showed how we display our snaps using the display cards that are available in our online store in the DIY Snap Supply section.


These cards work really well for the regular size snaps and when selling them in groups of three or in pairs but what to do about those irregular shape or larger size ones?  We have found several ways we like to keep them organized in our studio and displaying in shows.  A simple way of organizing is using jewelry trays with dividers.  You can fit quite a few snaps in a tray and additional trays can be stacked.  This looks really nice when putting them out at a show and doesn't take a lot of time with packing and unpacking.


But since we started selling our decorative snaps to several stores, we had to come up with another way to not only display, but also for merchandising.


For this purpose, we designed some simple cards just by using the Word program on our pc computer and then printing out on a heavy card stock.  The simplest way for this is to create a "Table" with squares in the size you want.  Here I fit 8 to a sheet and made them longer so they can fold in half with the fold at the top.


After cutting them out, they are folded in half.  We punch a hole at the top for hanging (optional).  We then punch a hole in the center for inserting the snap.  This hole has to be the right size or the snap will fall out if it is too large.  After a lot of searching, we finally found a hole punch in the correct size (3/16") to fit the snap.


Punch the hole through both thicknesses so the snap is more secure on the card when hanging.


Another cool thing is how the card can turn into a mini stand for display as well!


Here are some extra large snaps we made on larger size cards.  We made them the same way, but with only 4 cards to a page.  They show off nicely when standing up.


You will notice that our cards are very simple and plain looking and for a good reason.  We feel the card is only a background or support for the art piece which is what we really want to show off.  A busy pattern on a card can be very distracting and not show your pieces off very well.

You can also store or display your carded items in trays (or drawer dividers shown here) which is also quick and easy for packing and putting out at shows.


And if you aren't into making your own cards and want something already made, we have some new cards available in our online store in the DIY Snap Supplies section.  These cards are a soft plastic with a plush velvet background and a center hole ready to hang.  Snap jewelry is printed in silver on the front of the card and you can always add a sticker with your name on the very bottom or on the back.  The cards are 1-1/2" wide and the larger snaps on the cards shown below are 1-1/8" and fit quite nicely on them.


I

Creating your pieces in a snap are so much fun and versatile!  Just think of all the possibilities you can do with them!

Friday, June 2, 2017

Special for Father's Day

Father's Day is just around the corner and if you are looking for something special for him we have some unique jewelry in our men's section of our online shop.  We have cuff links, tie clips and leather necklaces all with an interchangeable snap base.  You just need the basic pieces and add a selection of decorative snaps to create several looks.


And now until midnight, June 9 (next Friday) take 20% off any items purchased from our Men's Snap Collection.  Enter the coupon code shown in the photo below:


And if you would prefer to make your own Father's Day gift or would like to start making your own interchangeable snaps from clay, we have another deal.  All of our Snap Decisions tutorials are half price for the entire month of June


Plus when you purchase your tutorial, you will receive your very own coupon code for 20% off your first order of Snap bulk supplies!


This offer is through our online store only.  The good news is that any of our tutorials purchased will be sent directly to your e-mail address as a PDF file which means if you are from Europe you will not have to pay any extra tax.

Wednesday, March 22, 2017

Snap Jewelry DIY Findings Update

When I first came up with combining the interchangeable snap jewelry idea and polymer clay, I approached Wendy at Shades of Clay about carrying some of the snap components.  She loved the idea and it was nice to have them available to purchase through her website instead of just through us.  We did a lot of research into finding supplies that were good quality and that would work best with the polymer clay and I also published several tutorials with lots of tips on working with these findings.


Things have changed over the last few years and while we have expanded our snap components, Shades of Clay has decided to go in a different direction and not carry them anymore.  (You can read her blog post about this here.)  Wendy has been very supportive and we plan to still continue on with bouncing ideas back and forth for inspiration.


Oh, and by the way, did you know that Shades of Clay now also has a blog?  You can follow it here.   They have some cool free tutorial links and one of them is a video Wendy made about the buna cord and o-rings.  I found this video very informative and some of her ideas are so inspirational!  I really like the softglass cord and joiner charms that go with it but if you are looking for different thicknesses and cord that isn't hollow, Shades has buna cord in several sizes.  I haven't tried the really thick size yet but I love how Wendy hid her clasp in this bracelet!  You have to watch the video to find out!

Bracelet created by Wendy Orlowski

Shades has also added some exciting and cool artist materials plus other brands of clay such as Fimo.  I love how we can buy almost everything we need for our clay at one place that is right here in Canada and at very comparable prices!

You might also want to sign up for her newsletter so you can get in on any new product announcements and specials they might have.

And by the way, I am not promoting Shades because of any kick-backs or pay for advertising.  I am just a happy customer and want to show my support for my fellow Canadian friend, Wendy and her fabulous shop!