Friday, May 20, 2016

Everybody Loves Quilts - 2016 Quilt Show

We are excited to be in the quilt show put on by the Shuswap Quilters' Guild coming up already on June 3 and 4 in Salmon Arm.  This large show only happens every 3 years and we had a really great time during the last one


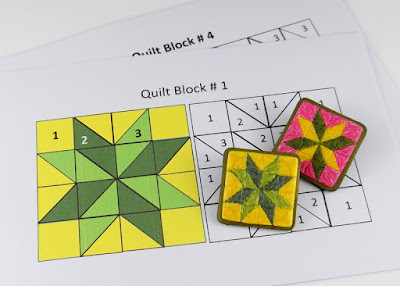
Instead of doing a live demo, we will be involving the attendees with a "Make & Take" project.  The ladies will have the opportunity to make their own 4 patch quilt block design from clay!


There is a lot of prep work involved such as making the sample templates for them to follow and mixing up all the clay colors so they are ready to cut into triangle and square shapes.


We also made clay bases to mount the quilt block designs on creating a natural frame background.  Each base has a large snap on the back so they can be added to a variety of snap base findings and used as an interchangeable button or worn as a necklace, bracelet or ring.      


They are also a perfect match for our "2 or 3 Way Magnetic Brooches" so they can be interchanged and worn several ways:


A - As a magnetic brooch (with charm),  B - As an eyeglass or badge holder (by changing the charm for the fancy metal ring) or C - As a necklace (by flipping it around and attaching to a neck chain).


We have a limited space and time for this "Make & Take" project so will set up a schedule at the show and encourage those who would like to take part to sign up for their preferred time slot and select the pattern and colors of their choice.

For more information on the show, you can follow their facebook page here.

Wednesday, May 18, 2016

Q-Tip of the Day

We love adding crystal rhinestones to some of our work to give it some sparkle or bling.  We only use the genuine Swarovski crystals from Austria as they are the best quality with perfect cuts and sparkle.  


I recently came across a simple tool for picking up and positioning these crystals that works like a charm and is in the form of a pencil.


Use a regular pencil sharpener to give it a point.


Then pick the rhinestone crystal up by applying just a little bit of pressure to the center.


It will stay on the tool while you position it on the clay design.  


If your clay is really soft, you can even use the pencil to gently push the rhinestone in to set it.  We use Kato clay, however, which is much firmer so we use an empty tip from a pen as a tool to set them in.


I was working with some smaller 4mm size rhinestones the other day and the pen blank was just a little too large so I was looking around the studio for something that was smaller and a better fit.   I then noticed our little jar of Q-tips on the table and there it was!


The Q-tips are handy for so many things and I like to cut them in half and store them this way.


I remembered that some of the plastic type Q-tips are hollow inside and the ones we had were that type.  When I tested one out on the smaller rhinestones, I discovered they were a perfect fit!


If you are looking for some genuine Swarovski crystals to use with your clay, we purchase large amounts in bulk and have them for sale in our online store.  We even found these cute little containers for storing and keeping them handy and with the purchase of a variety mix or minimum 5 packages in colors of your choice, you will receive a Rhinestone Pick-up Pencil as a bonus gift.


Thursday, May 12, 2016

Rainbow Jelly Roll Cane and Recreating With the Left-Overs

We had to make up more of our Rainbow Jelly Roll "cane" last week to fill some orders for crochet hooks and stitch markers.  This cane takes quite a bit of work to make as there are six colors needed to create the gradual blend.


We made some "snap art beads" from this cane as well.


To make the snaps using a cane such as one like this, I simply reduce my cane to the same size as my round cutter used to fill the snap bezels.  I like to stretch my cane out so it lasts as long as possible so rather than using thick slices, I slice it a little thinner and back it with a clay circle.  You can then make it into a cabochon to fill the snap bezel following instructions on page 6 of my tutorial (part 1)


When making canes, we always end up with left-overs (as shown above) so we like to use those "scraps" in other ways.  One of the most popular techniques is creating "Natasha" beads.  The Natasha beads are fun to make.  We call these "inside out beads" as the clay is literally cut and turned inside out to reveal the cool pattern.


One can use so many Natasha beads, however, and while making them one day, I was inspired with an idea to create a new technique that I call Art Deco.  Instead of a square bead, we end up with flat mirror images.  They can then be used to create other shaped beads, buttons, snaps and whatever else you can think of.


These are such happy colors so I named them "Fiesta" and are now available in our online store.


Tuesday, May 3, 2016

Faux Stone in Amethyst Color

A few of our Okanagan Polymer Clay Guild members got together last week for some clay play time.  We all mixed up batches of faux turquoise and some of us experimented with new colors.  I had been wanting to try creating a faux amethyst so was a perfect time to give it a whirl.  I really love the results and is now my new favorite faux stone color. 


We also played with Donna Kato's faux opal technique and I combined it with the amethyst to create a pendant.


Later we made the faux Amethyst into "snap" art beads which are now for sale in our online store


Faux Amethyst "Snaps"


Faux Amethyst Stone Snap Necklace


Faux Amethyst Stone Snap Bracelet

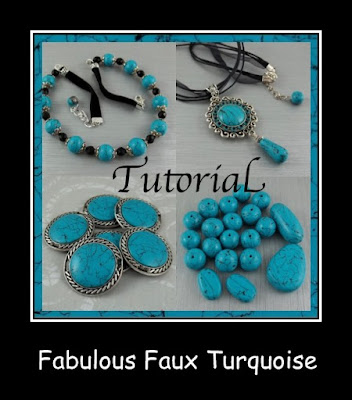
The faux Amethyst stone was created using my Faux Turquoise technique.


While I share my clay color recipe to create the traditional Arizona turquoise color in my lesson, it can be adapted to any other clay color of your choice.

Here are a few other colors we have created: