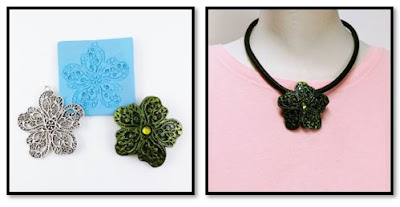
There are many types of materials on the market, you can use to make a mold or texture sheet or you can even use polymer clay. Helen Breil recently published a new lesson on textures which is full of tips and inspiration for making your own textures which can also be applied here. I highly recommend her lesson if you want to explore this more.
To make a mold from my metal charm shown here, I am using scrap Premo brand clay that I had on hand and wanted to use up.
Roll out a sheet of clay that is thicker than the item you want to make an impression from. Place it on a ceramic tile that has a smooth finish and you can put directly into the oven. Roll the clay flat so it sticks to the tile and there are no air pockets trapped underneath.
Apply a generous amount of cornstarch to the clay as a release. You can brush any excess back into your container after. Firmly press the metal piece into the clay. If the piece is not totally flat, you may have to tip or rock it back and forth or around to get a good impression.
Clay might raise up a little higher in some of the open areas. You want it to be flush so either push it back down with your finger or scrape off some of the excess clay from those areas and then smooth out with your finger.
If the piece you are making a mold from is metal, you can always leave it in for the baking process and remove it after. Trim your mold but leave it stuck to your tile and then bake according to temperature of the clay you are using.
Here are some samples of pieces I created from my own molds using various metal charms.
The last two pieces I made were mounted on a snap for interchanging. I really prefer this method for several reasons. Before it was always a struggle as to how to finish off each piece. Placing a snap on the back allows the piece to be worn more than just one way.
For instance, these larger size pieces can be added to a snap base on a necklace or worn on a scarf. I use to have so many finished jewelry pieces in stock waiting for that right person who is in love with just that one piece. With snaps, however, I can "Create the Art" and the wearer can "Choose how to Wear it".
I have several options for adding a snap design to a scarf. My "It's a Cinch Scarf Clip" is my original design and will work with almost any scarf type or thickness. I have also come across these traditional scarf slide type rings that have a snap base. They are available in my online store under the Snap Scarf Slide section but also in the DIY section.


No comments:
Post a Comment