Showing posts with label texture sheets. Show all posts

Thursday, January 16, 2014

Personalized Textures

I've been experimenting with making some of my own texture sheets.  This is something I've been wanting to do for a while but just didn't have the time.  Here are two new designs I've made so far, used to create some scarf jewelry and earring beads.  They are both for sale at Essentials & Beyond on Victoria Street, downtown Kamloops.  They carry a wide selection of our scarf accent pieces as well as our interchangeable earrings collection.


Interchangeable Earring Beads are also reversible


Interchangeable Earring Beads are also Reversible
If you are interested in making your own texture sheets, Helen Breil has a tutorial on how to do this.  She has some really great tips and is a good way to get you started. 

Tuesday, August 28, 2012

Working Out The Details

I've been in the middle of working on several projects and mixing up some Pantone fall 2012 colors in between having family visit from out of town.  So far not much of the clay work is getting finished but I should have some new color recipes ready for you soon.


In the meantime, I thought I would share one of the projects I have been working on.  I've had requests from several wholesale customers to create some sort of pin or pendant that would fit the type of scarves they make which are quite a bit bulkier than an average one.  When creating this new design I have to not only consider the thickness of the scarf but the size and shape of the pin so it will look balanced and hang properly.  It is like working on a puzzle and you feel really great when the pieces start to fall into place.

This is one prototype I created using scrap clay and mica powders.  The texture plate is Helen Breil's which is one of my absolute favorites.


Sunday, February 20, 2011

More on Textured Tubes


I recently purchased a few more texture plates by Helen Breil which are so much fun to play with.  I love the deep textures and flexibility of them so I can run them through my pasta machine with the clay but had discovered they are a little too flexible to use for the textured tubes.  My Textured Tubes tutorial is available in our ArtFire Studio as well as our Etsy Shop.

Solution:
Make a copy of the texture plate with regular clay and/or the Sculpey Bake & Bend.

Tip:
If I'm going to use my texture for tubes only,  I prefer to make the texture sheet a little thicker and out of regular clay as I don't need it to be flexible.  I also don't need a large texture plate -- just an area large enough to texture my beads or a pen blank.

How:
In this case I wanted my texture to be exactly like the original texture sheet so this is what I did:

I studied the texture sheets to see what areas I would want to use and would work well for the tubes.  I then made a texture plate of that area from Sculpey Bake & Bend, using my pasta machine so I could get a deep impression.


After baking, I created another texture plate from the one I just made but this time making it with regular clay and running it through my pasta machine again so I could still keep that nice deep impression.


Voila!  I now have a texture sheet that is an exact replica of my original but out of regular clay that I can use to make my textured tubes!

And here are some tube beads I created from the new texture sheet....


These were made using a turquoise color mix called Lagoon (recipe #8-3 in Carolyn's Color System Tutorial) and highlighted with antique copper mica powder pigments.  I embedded some antique copper beads into the ends before baking like I showed in a previous blog post.

I have a necklace design in mind for these beads and will show you when it is finished.

Sunday, February 6, 2011

Make Your Own Flexible Texture Plates

This is how to make your own flexible texture plate so you can use them right in your pasta machine afterwards.  For this technique I use ....


That's right ... Sculpey Bake & Bend.  It has some really good uses other than making bendable animals...  I found they make great texture plates -- and flexible ones at that.

I found these paper heart doilies at the dollar store.  I want to use them to make a texture sheet.


1.  First of all, make sure the Sculpey Bake & Bend is well conditioned.  I find some of the colors aren't quite as soft so I like to mix them until I get a nice consistency.

2.  Roll out enough clay in your pasta machine on the 3rd thickest setting (I used the #3 setting on my Atlas) that is slightly larger than the doily.


3.  Making a texture plate from one of the paper doilies won't make a deep enough impression so take a stack of about 4 - 5 that are "stuck" together and do not separate them.  This will add depth and make a better impression.


4.  Lightly dust the clay sheet with some cornstarch to prevent the doily from sticking.  I generally use water but with the paper that won't work so well.

5.  Change your pasta machine setting to the 4th thickest setting (#4 on an Atlas).  Lay the doily face down onto the clay sheet and carefully insert the two together into the pasta machine and roll through.

6.  Place your clay sheet facing up on a clean ceramic tile making sure there aren't any air pockets trapped underneath.  Lightly tap it so it sticks to the ceramic tile.  Carefully peel away the paper doilies and trim the edges all around so they are nice and neat.  Bake your texture sheet right on the ceramic tile following the temperature and time on the package.


7.  Allow your sheet to cool completely before removing it from the ceramic tile.  You now have a texture sheet you can use with your regular polymer clay over and over and it is flexible so can be used right in your pasta machine at your thickest setting.


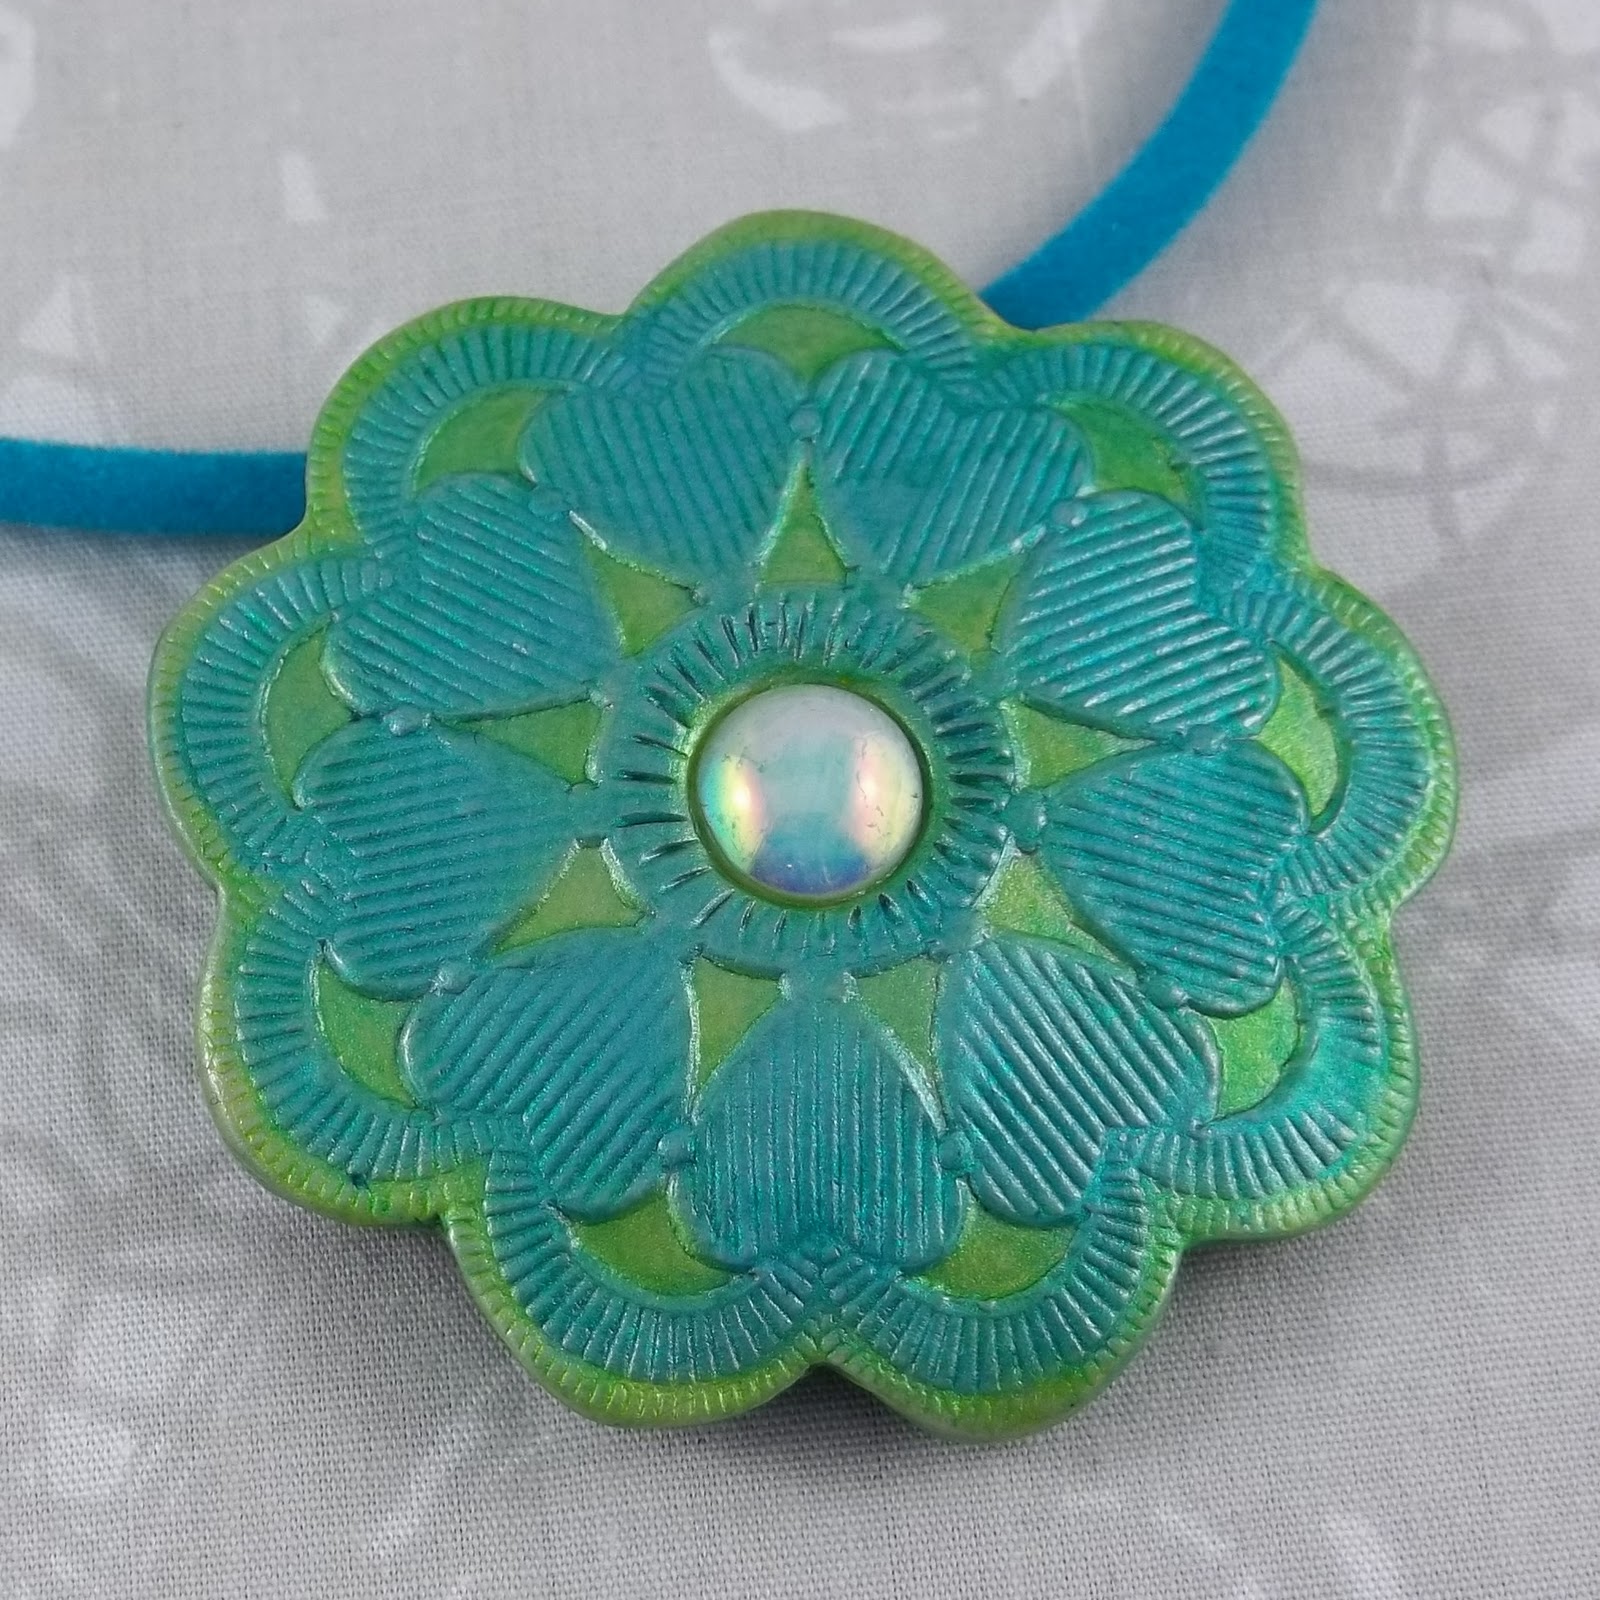
These are a few pieces I made from my new texture sheet that I highlighted with mica powders.


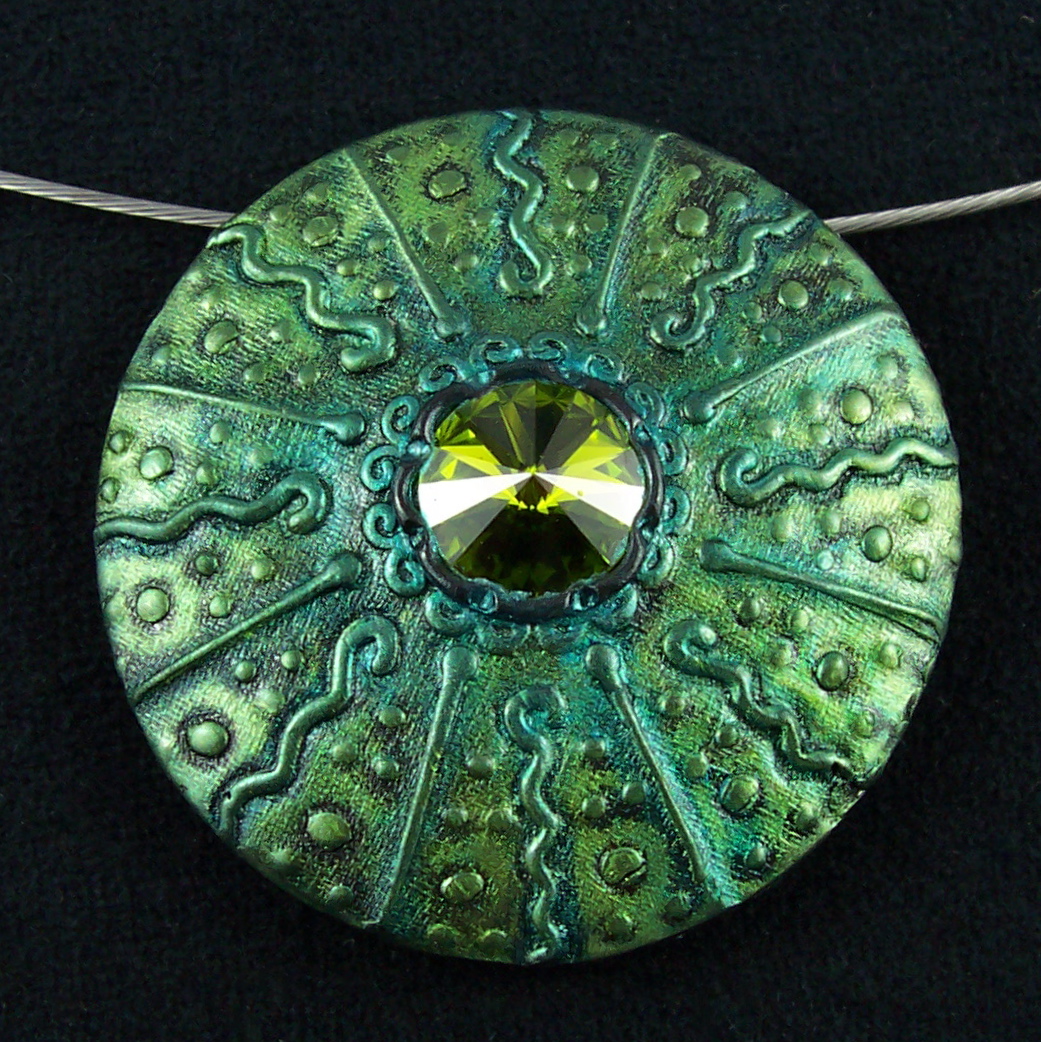
You can use this method to make other texture sheets.  Here is one I made from a piece of vintage lace.


And some pendants I have made from it:

Oh yes, and another cool thing I found is the container from the Sculpey Bake & Bend works great for storing canes afterwards!


Hope you enjoyed this little tutorial and have fun with it!

Wednesday, October 20, 2010

New and Fun Textured Pieces

Remember the supplies I showed you the other day that I recently purchased?  One of them was a texture plate from Helen Breil Designs called the Conga Line.  I finally got around to trying it out and fell in love with it instantly!

Here are some new buttons I created using this new texture design.


Ever since I made my first custom order shawl pin, I've been wanting to make more but never seemed to find the time.  I finally created 2 new designs using this same wonderful texture plate.


I have more designs I'm working on but these are a start.

And of course I had to create some switch plate covers using the same color scheme.


Wednesday, October 6, 2010

My New Toys Arrived

Actually they arrived a couple of weeks ago but I've been too busy to do anything about it -- I was really low on clay so was time to order more from Shades of Clay.  Each time I place an order I like to order a few extra "goodies" to play around with.  Here are some of the things I bought this time:


Shown here back to front:

- A new mandrel set which I'm not sure exactly what I'm going to do with yet but it looked like something fun to play with and the price was right....
- More PYM11 -- this stuff is fantastic!  Had to have more as my first can was almost gone.
- Some large texture sheets with leaf patterns.  These are quite large but thinking of using them for some collages.
- More Kato clay -- of course lots of black, pearl, white and transluscent which it seems you can never have enough of.
- Wire -- great for making button shanks, etc.
- A new texture sheet by Helen Breil Designs -- my first one and I thought this one was too yummy to pass up!
- And of course the latest CaBezels by Wendy Orlowski which I will show you a few things a already created with them....
- Not shown are some more mica powders (experimenting with Perfect Pearls to compare) and some Pinata Inks to play around with.

I really like Wendy's CaBezels and I have more ideas on using them which I should hopefully be able to get around to sometime later in the month.  Here are a few pendants I made in the meantime:

Thursday, September 16, 2010

Learning New Techniques

I like to work with a variety of techniques and always open to learning something new.  I don't have a favorite but, after all, they say variety is the spice of life.

I'm constantly drawn, however, to textures and what you can do with them.   Helen Breil is a fellow Canadian artist who's work I truly admire.  She has a different style and I love how her jewelry art pieces are created from her own textured designs.  I purchased her recent Radiating Lines tutorial which I found very fascinating and couldn't wait to try it out.

This is the first pendant I made experimenting with my own texture plate I created.  I had the prettiest rivioli crystal in my favorite green which I used for the centre point.


I had a lot of fun making this pendant and I plan to explore this technique a little more and develop my own style.  I'm always looking for work that will coordinate with my double-sided and textured tube beads.  I will be sharing more on that in the future.

Thursday, October 22, 2009

Going "green" with my scrap clay - part 3

Similar to making moulds, I also like to make my own texture plates and here are a few that I have made.


For easy identification, I prefer to make my texture plates in different colors.  Polymer Clay Central had a Texture Sheet Swap some time ago and there are a lot of great ideas there.  If you're not sure how to do this, Helen Breil has a great tutorial available.

Similar to texture sheets, you can also use the scrap clay for making reverse textures or moulds from your rubber stamps:


Here are some other ways I like to use my scrap clay:
  • Use as a filler for beads
  • Use as a backing when making a clay sheet 

  • Colors can be mixed into Natasha Beads (This bead was made from left over cane scraps).

  • Build some canes . . .
I like to combine my scrap clay into colors that can compliment or work together -- here is an example:


I separated the colors that might make nice skinner blends or for more mixing.  Here I have three piles of greens that I separated.  I liked the combination of the light and dark greens in the two piles on the left and made some fun leaf and jelly roll canes from them.


There are so many ways to use up your scrap clay, there is never any reason to throw any out.  Of course once it is baked, that is a different case but if it didn't turn out quite like you expected -- then cover it up with a veneer and create a new look!

Because I don't like to waste, I have a rule of thumb to spend a little extra time examining my piece closely before firing making sure it is smooth and nicely finished.  If I have any doubts about my pieces not turning out, I prefer to smoosh it and start over again rather than bake and deal with it later.