Sunday, April 10, 2016

Crackly Goodness in a Snap! - mini tutorial

I am always experimenting with various ways to work with alcohol inks and also creating crackle effects, so I was intrigued with Barb Fajardo's "Crackly Goodness on Polymer Clay" lesson at CraftArtEdu as it combines both.

I really enjoyed the lesson and picked up a few tips but I find the inks to be super messy and so unpredictable!  I know some "clayers" love the unpredictable part and at times I do to!  But there are times when we make a piece and then someone contacts us and says "how much they love those colors and can we make another one for them".  Working with regular polymer clay colors that is not an issue as we record all our clay color recipes, including combinations and blends.  But when it comes to inks, however, that can be a big problem.  This is an example of 3 scarf jewelry pieces we made using the same 3 ink colors and how each one came out slightly different.  Since we realized this is what happens, we make sure we color the beads the same time as the scarf bail so they match.


Also, working with alcohol inks can be extremely messy!  I purchased the Tim Holtz Ink Palette sometime ago and love it but you can see how the colors were starting to get all over the place.


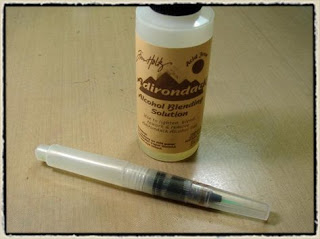
Then I discovered a new method that is so much cleaner and works incredibly well!  Tim Holtz shows how you can fill a water brush with the Alcohol Blending Solution and using it to paint with.  The cool thing is that the brush is pretty much self-cleaning when you are switch colors!  You can see the entire lesson here.  Even though it is for making cards, the ink painting in steps 1 to 4 are all you need to follow.


I could hardly wait to try this but had to wait until I could track down one of those cool brushes.

My first attempt with this method was to make some "snaps" using Barb Fajardo's Crackly Goodness technique.  I was pleasantly surprised as to how much fun it was and easier to clean the brush (wipe on paper towel) between colors!


Some of the snaps I used silver (I can't say anymore or I would give part of the tutorial away) to match the silver colored bezel on the snap and I tried one (the flower) with black which was quite cool and gave such a different effect.


Thursday, April 7, 2016

Snap into Spring!

It is springtime and we have been busy creating new designs in  spring and summer colors.  Our online "webstore shelves" are filling up with more items and our "Snap Decisions" Collection has expanded with even more selection.


We have also added more items to our "Snap Supply" section.  Some of our favorite items are now available in multiples and items such as the blank snap bezels are in larger bulk quantities.


Did you know that our snaps that we sell will fit into other commercial brand snap jewelry?  And, did you know that there are several snap jewelry companies that all take the same size (regular - not mini) snap?


When I first discovered the snap jewelry findings (over a year ago), I came across only two companies that sold them and now several more have sprouted up since.  This is all very exciting as more people will be looking for other pieces to expand their interchangeable jewelry collection!  We have many snap base findings available that are similar to what the other companies offer but the main difference between our "snap designs" is that they are all original and handcrafted works of art instead of mass produced by a factory.

The snaps are also so much fun to make.  I haven't found a clay technique that will not work with them yet!

If you would like to make your own "snaps" with polymer clay and need some ideas or help to get started, my tutorial can help you a lot.  I show how to "prep" the snaps so you can add any of your clay designs to them without the need for any glue.


And if you would like to make your own snap base findings from clay, my second (part 2) tutorial will show you how.


So for this month only, we are having a huge promotion on both our tutorial and our snap supplies to get you started.


Purchase our combined part 1 and 2 of our Snap Decisions tutorial for only $10 U.S. ($13 Cdn.).  That is like buying Part 1 and receiving Part 2 for free.  This special offer is available from our Etsy Shop (as an instant download) and in our online store where both tutorials will be sent out by e-mail.

And to get you started with your own snap supplies, receive 10% off your entire order from our online store by using the coupon code:  Aprilsave10


This offer is good until the end of April and remember that our online store is in Canadian dollars.  This means for fellow Canadians, you do not have to pay the high exchange for U.S. prices and if you are from the U.S. you can save even more, as for every dollar spent in our store, only costs you about 76 cents!

So join the fun and snap into spring!

Thursday, March 31, 2016

New Yarn Shop in Kamloops - Knit 2 Yarns

It is always exciting when we get to announce a new shop that is selling our work.  Knit 2 Yarns is a brand new shop that just opened up last week in the Valley View district on the Trans Canada Hwy in Kamloops, BC.


While the store may be new, we are familiar with the owner, Carla, as she use to work at Katja's Quilt Shoppe, in the same shopping center, for quite a few years.  As an avid knitter, as well as quilter, she decided to follow her passion and fill a void for a much needed yarn shop on that side of town.


Carla, owner of Knit 2 Yarns

Carla's shop has a lovely set-up with plenty of country charm.  Her baskets and vintage suitcase displays add a nice touch and I love the barn doors in the back separating her classroom area for future knitting classes.  We are already discussing the possibility of doing a Button Make & Take class in the fall.


If you live in the area and love to knit or crochet, you will want to stop in and check this lovely store out.  Knit 2 Yarns also has a facebook page you can follow and Carla has a blog if you want to see some of the projects she is always working on and loves to share.


Wednesday, March 23, 2016

Brilliant Bloom Flower Buttons for Spring

We introduced our little Brilliant Bloom buttons a few years ago to the yarn shops that sell our work and they were a huge hit.  We make the flowers in 10 different colors along with leaves and ladybugs.  The Brilliant Bloom buttons below are about 3/4" in size and have 2 holes for sewing where the ones below are our Mini Blooms that are only 1/2" and have a metal shank embedded in the back.

Brilliant Bloom Buttons
Brilliant Bloom Lady bug, pink flower and leaf buttons
Mini Bloom Buttons
This year we are introducing a much larger version -- our Gigantic Blooms.  These buttons are a concave shape and two inches in diameter and each one comes with one of our signature lady bugs.

Gigantic Bloom Buttons
Gigantic Bloom Button in Teal Blue
These buttons are already available at Fibre Expressions Quilt Shop, on the Sunshine Coast in Sechelt, BC.  They are also available in our online store in our handcrafted buttons section.

Tuesday, March 22, 2016

Seam Rippers

We cover the double-ended seam rippers to sell but have had requests for single ones that can be worn around the neck so they are handy while sewing.  We created our own design by adding a swivel clip at the end and include a 30" stainless steel necklace chain.  The clip can also be used to attach to your bag.


Our seam rippers and other sewing, crochet and knitting accessories are available in our online store and our Etsy shop.

Sunday, March 6, 2016

Getting Back into the Swing of Things and Mini Organizing Tips for Snaps

I can't believe it's been a month since I blogged last.  Dave and I are both recovering from some health issues.  I am happy to say that the physiotherapy has been helping with the Meniscus tear in my knee and hopefully I won't need the surgery and life can start getting back to normal.  Dave's health issues have been much more complicated with his kidney failure and all and hopefully he will feel up to helping with the clay again soon.

One of the things that can bog anyone down this time of year is tax time and inventory.  It seems like each year we add more items to our inventory list and it takes forever to count it all.  This year we have all our snaps and snap findings but I don't really mind as they have been a fun addition to the clay.  We have had to find new ways to organize everything and last year we set up a new area in our house to keep all of our finished clay work and a "shipping station" for orders.  I will share more of that with you in a future post.  For now I thought I would share with you a few other ways how we organize our interchangeable "Snap" art beads.

We have these plastic strips available in our online shop which are great for storing the snaps but we like to also organize them in smaller groupings.


For instance these snaps are matched up in pairs which work well for items such as earrings, a bracelet bangle with 2 snaps or even cuff links.


We also have snaps in groupings of three ready for other items such as a necklace or bracelet.


So it is easy to remake the cards yourself by simply cutting them into sections.  I cut this one just above the third hole (fourth actually if you count the hole at the top for hanging).  This will give me two cards.  One for a grouping of 2 snaps and the other for a grouping of 3.  For the bottom half, I just re-cut the top hole with a hole punch for hanging.


The cut edges can be quite sharp and a simple solution was this rounded corner punch I found at the craft store in the scrapbooking aisle.


For our cuff links, we punched 2 holes a little larger for them to fit through and rounded the corners.


It makes a nice display to show them off.


We print out our own tags to put on the back for finishing.


Another solution is the strips made with card-stock that are perforated for easy separation.  These work great for selling the snaps individually as well.


And of course the strips also work really well for displaying your snaps at shows.  You can arrange them on a table or hang them almost anywhere.  We have this large revolving stand we purchased for the Salmon Festival and didn't want to see it stored away when not in use.  It fits in the corner of the room and works really well for keeping our snap inventory organized.


Tuesday, February 9, 2016

Pantone Spring 2016 Fashion Colors Final Review and Clay Recipe Links

Here is the final review of the Pantone spring 2016 fashion colors.   Click on the photos below to see the clay recipes using Kato clay.  If you would like to see more clay recipes for the past Pantone fashion colors, go to the color recipe page at the top of our blog.